Custom Page Configurator – Technical Overview
Custom Page Configurator – Technical Overview
The Custom Page Configurator is a Genesis block designed to enable the creation of custom pages within a Genesis application. This block can be executed multiple times within a single Genesis instance, allowing for the creation of distinct collections of pages.
The Configurator accelerates the development of OneStream Dashboards by utilizing common layouts and providing for the creation of Assembly files based on said layout(s). Notably, this block does not include a visual designer like other content blocks; instead, all custom page development occurs within the Maintenance Units which are created within Genesis Workspace during configuration. Once pages are created, developers can build the content needed to accommodate their case for their application-specific requirements.
Once a Genesis development instance is created using the Solution Starter Template block, the Custom Page Configurator is automatically added to the Config Application Group within your Genesis instance. For Genesis applications intended for commercial distribution, the Configurator should be removed before submitting the application to the Solution Exchange or distributing it to customers since the purpose of this block is simply the creation of Maintenance Units, application-development components and Assemblies.
Default Location of Custom Page Configurator
Creating Custom Pages using the Custom Page Configurator
The Custom Page Configurator block provides a structured way for developers to create Maintenance Units. Each MU created by the block may be used as a page within Genesis. With multiple layout types to choose from, developers can build dashboard to satisfy any application requirement.
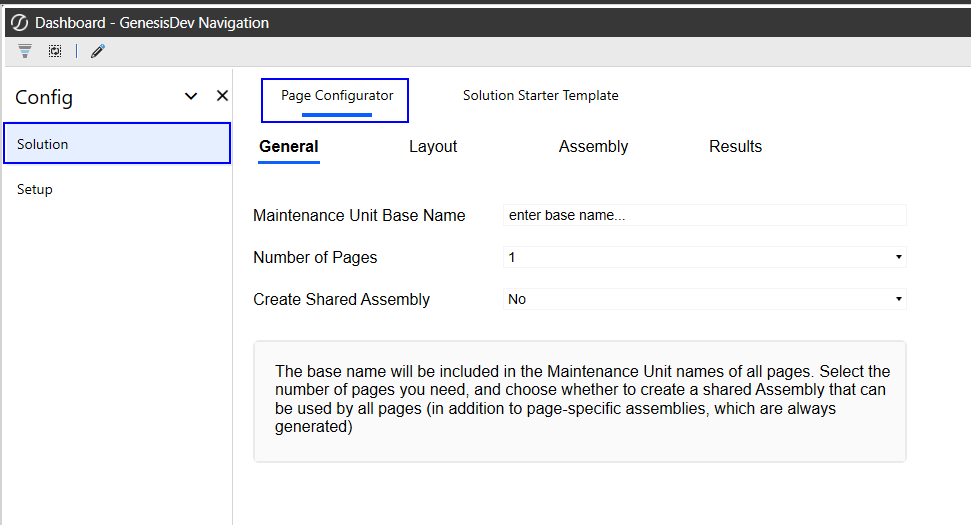
The Customer Page Configurator guides developers through a four-step, tabbed process for creating custom pages:
- General - Define basic properties such as the Maintenance Unit name, the number of pages and whether to create a shared assembly.
- Layout - Select and configure the layout for each page.
- Assembly - Choose which assemblies to create.
- Results - Review the configuration and results before finalizing.
Each of these steps is detailed in the following sections:
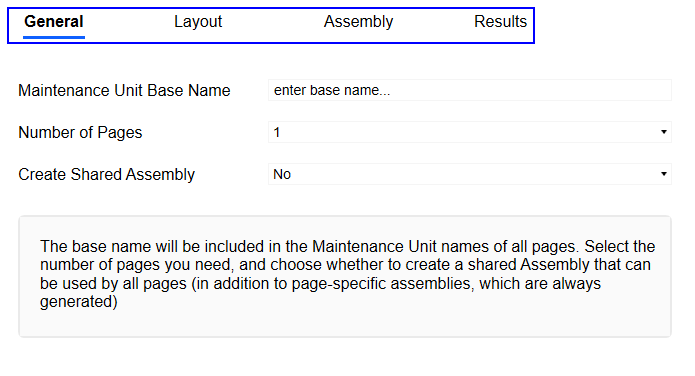
General
Maintenance Unit Name
- Must be unique within the Genesis Workspace.
- NOTE: Using an existing Maintenance Unit name may overwrite existing components.
- Only alphanumeric characters are allowed (no spaces or special characters).
- Once set, the name cannot be changed within the Custom Configurator block, but it can be modified in the Workspace. For renaming, refer to the Developing Content section.
Number of Pages
- Specify how many custom pages to create (maximum 12)
- Create a Shared Assembly (yes/no option)
- Choose whether to create a shared assembly, which can store common code accessible by any Maintenance Unit within the Genesis Workspace. If the Configurator is run again, it will create a new Maintenance Unit, leaving the renamed one as-is.
- Best practice: Create a single dependent assembly in one custom page unless multiple dependent assemblies are required for specific use cases.
- If additional pages are required for your solution, they may be created manually following the naming convention standards outlined in the Developing Content section of the Solution Packaging Kit**v1.1.docx.
Layout Configuration
- Each page can have a distinct layout and name. The page name becomes part of the dashboard name for the Maintenance Unit.
- Seven default layouts are available. If none meet your requirements, select the single-area layout and add panels or dashboard elements as needed following the naming convention in the Developing Content section of the Solution Packaging Kit**v1.1.docx.
Assembly Selection
Within the Assembly Selection area, developers can select which templates they would like to create as part of their configuration. The Configurator will then create the selected template within the Assemblies section of the Maintenance Unit.
Even though it is the best practice to use Assemblies, Business Rule-like assemblies are also an option that can be selected. If there is a need to utilize existing code from prior solutions in a new custom page, these BRs may be used for this purpose. In this case, when a rule is triggered, the execution will bypass the MUAssemblyFactory and the logic from a component would be executed directly.
Where possible, it is highly encouraged that legacy Business Rules be converted to Services. The use of Assemblies is a more consistent and self-contained way to build and code applications. As an example, when embedding code in a dashboard, the logic is easier to execute – dashboard developers do not need to know the BR name. A simple designation of WSMU and the passing of parameters is all that is required to execute the logic (see example 1).

Example 1: A button calling a function and passing a parameter
Organizing Your Code
When creating logic within Assemblies, it is critical to maintain organization. OneStream recommends that all application logic be built in a clean, succinct fashion using multiple classes. Do not simply put all logic into the services instantiated within the Maintenance Unit (WsasComponent.cs, WsasDashboard.cs, etc.) - create smaller, easier to digest classes organized within the Assembly. It is recommended that a structure like the one shown in example 2 is created.
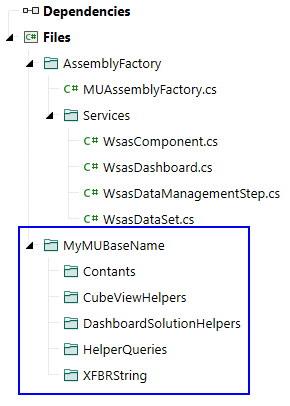
Example 2: Folder organization to store classes for constants, CV Helpers, Dashboard Helperes, Helper Queries and XFBR Strings. This structure resembles a Business Rule structure.
To build this structure, add a folder by right-clicking Files and selecting Add Folder

Name the folder same name as your Maintenance Unit Base Name which was used in the General tab upon creating the custom page using the Configurator. It also appears in the first section of the Assembly name:
![]()
The MU Base Name in this example is “MyMUBaseName”
Under the new folder, developers can then create any number of additional folders and the classes needed to build out the solution. For a minimal structure, OneStream recommends that a core set of folders be used for some of the most common classes created – Constants, Components, Dashboard Extender, Dashboard XFBR String. The specific folders and the organization of folders and classes will be dependent on the application being developed and some of the best practices and organizational structures that developers are most comfortable with.
Key best practices for coding your application are summarized below:
- Create a folder, using the MU base name provided to the Custom Page Configurator to house a folder structure for the classes that will be used in your application.
- Containerizing your code within a structure will make it easier to parse-through upon code review when the application is submitted to the Solution Network
- There are currently no services that interact with the import processes of OneStream from inside an Assembly. Parser, Connector Conditional and Derivative rules are still created in Business Rules.
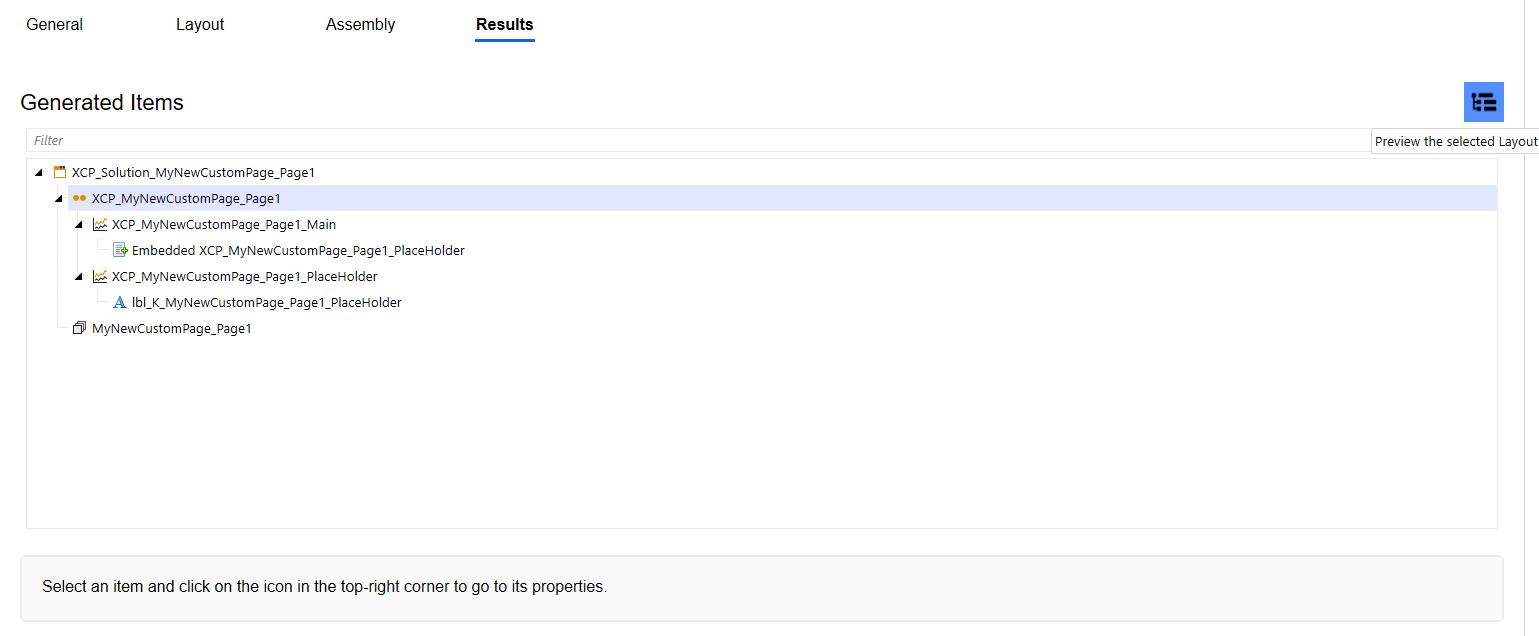
Results Review
After configuration, review the summary and results to ensure all settings and selections are correct. Developers can then navigate to any component shown in the tree and be taken to its position in the Workspace for review. Simply select a component and then click the Preview the selected Layout button in the upper right-hand corner as shown below (NOTE: this feature is only available within the WinApp).