Assembly Development Best Practices
Assembly Development Best Practices – Using an Integrated Development Environment, Git, and OneStream Developer Studio
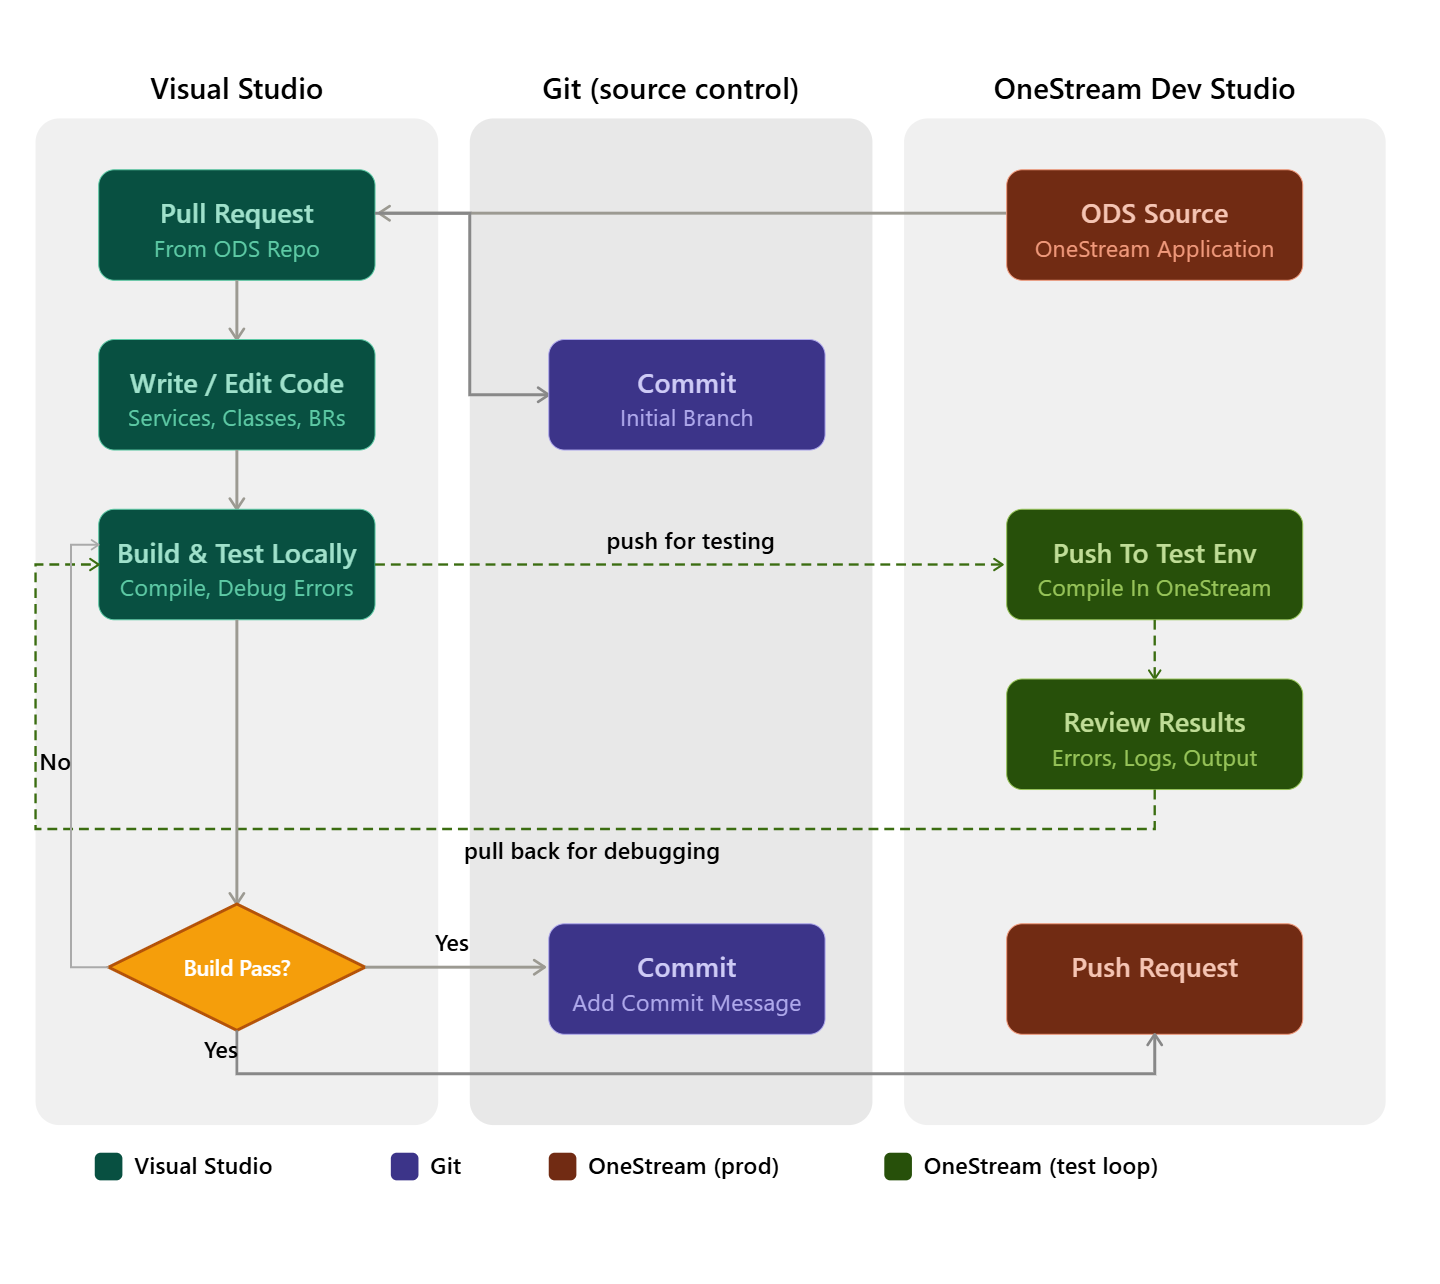
This section provides best practices for developing the core logic of an application using business rules and assemblies (assemblies being the preferred coding construct). When building logic for OneStream applications, three technologies, when used together, create a robust development workbench: IDEs, Git, and OneStream Developer Studio. The roles of each technology are described in the sections below.
Integrated Development Environment (IDE)
Using an external Integrated Development Environment (IDE) such as Microsoft Visual Studio or VS Code for OneStream Assembly development provides professional-grade engineering capabilities that the OneStream editor cannot match.
While the built-in editor is convenient for quick logic updates, an IDE is essential for complex development efforts where maintainability and speed are priorities. Key Benefits of Using an IDE include:
- Advanced Productivity & IntelliSense: One of the most significant upgrades is the use of IntelliSense while coding in VB.Net or C#.
- Beyond Basics: While the OneStream editor has limited IntelliSense, a full IDE can download OneStream reference assemblies to provide full object introspection.
- Code Completion: Smarter suggestions for BRApi calls, custom namespace objects, and complex .NET libraries like OpenXML.
- Refactoring: Tools like Microsoft Visual Studio allow for global "Rename" or "Extract Method" actions that would be manual and error-prone.
- Sophisticated Debugging & Testing: The inherent editor relies heavily on "log and check" debugging, which is slow and tedious.
- Local Debugging: You can attach debuggers to local instances or use unit testing frameworks to validate logic before it ever touches the OneStream environment.
- Error Detection: IDEs provide real-time syntax checking and linting, catching bugs as you type rather than after a multi-second compilation wait in the platform.
- Source Control & Collaboration: The built-in editor lacks native integration with modern version control systems.
- Git Integration: Using an IDE allows you to manage your code with platforms like GitHub, GitLab, Bitbucket, or Azure DevOps. This provides a full history of changes, branching for features, and easy rollbacks.
Using Git for Version Control
Git is a distributed version control system that brings structure, safety, and collaboration to software development. For teams building and maintaining solutions in OneStream — whether coding business rules or assembly files — Git provides an essential safety net and workflow backbone. It enables teams to track every code change, collaborate effectively, compare commits and recover from mistakes quickly, all while maintaining a clean, auditable history of the solution's code evolution.
Key Benefits
- Change Tracking & Audit History — Every modification is recorded with who changed it, when, and why — critical for audits and tracing discrepancies.
- Safe Experimentation — Branching allows developers to build and test changes in isolation, without risking the stable production configuration.
- Rollback & Recovery — If an update causes issues, Git enables an instant revert to a known-good state.
- Collaboration Without Conflict — Multiple developers can work on different parts of a OneStream solution simultaneously, with Git's merging capabilities reconciling changes systematically.
- Release & Environment Management — Tagged releases make it easy to track exactly what version of a solution is deployed across Dev, QA, UAT, and Production.
OneStream Developer Studio
Developer Studio streamlines the development process as a stand-alone application that connects with an OneStream� environment and application then creates local copies of a workspace assembly file or business rules and workspace assembly files. It enables developers to sync (push and pull) changes between what you have locally and what you have in OneStream. Developers can also leverage IntelliSense within an Integrated Development Environment (IDE) to accelerate the development process.
With Developer Studio, you can:
- Set up and manage repositories for project files.
- Push and pull changes to files between the OneStream server and your local environment.
- Modify code locally in any IDE.
- Download reference assemblies and integrate IntelliSense capabilities
The diagram below demonstrates the flow of development using the aforementioned technologies:
Example - Using an IDE with ODS to Make Changes to an Assembly
The following example will demonstrate how to use an IDE (in this case Visual Studio) to make changes to an assembly file. It will demonstrate how to connect to an instance of OneStream via OneStream Developer Studio, how to perform a pull request for an assembly file in an existing Genesis Workspace, the application of a code change, and then a push request to submit that change back to OneStream. Since there can be variability in the IDE and Git platforms used, this example will not focus on Git platform integration. For more details on how to include Git for development, please refer to the prior section.
The example used here can be replicated in any Genesis environment for training purposes with these prerequisites:
- An installation of OneStream Developer Studio (ODS). While the process outlined below provides a demonstration of how to use ODS, installation is fully documented in the Developer Studio Guide at documentation.onestream.com. The full product documentation also describes additional product features not described here.
- The creation of an ODS local repository for your OneStream assemblies
- A license/login for an IDE
- A OneStream Cloud instance, minimum version 9.2
- An instance of Genesis with the Custom Page Configurator
Step 1 - Create a Maintenance Unit using the Custom Page Configurator
Configure the Maintenance Units as shown below:


Step 2 - Create dashboard components to simulate a coding exercise
Within the Workspace created by the Configurator, create a parameter, a label, and a button, following the naming conventions outlined in this document. Configure each component with the properties shown below:
Parameter
Name: prm_ExampleIDE_Main_LabelParam
Parameter Type: Literal Value
Button
Name: btn_ExampleIDE_Main_Execute
Server Task
Selection Changed Server Task: Execute Dashboard Extender Business Rule (General Server)
Selection Changed Server Task Argument: {WSMU}{}{}
Label
Name: lbl_ExampleIDE_Main_Output
Text (use {1}, {2} for …): |!prm_ExampleIDE_Main_LabelParam!|
Add the label and button components to the XCP_ExampleIDE_Main_Main dashboard (remove the PlaceHolder db first):

Change the dashboard layout to Vertical Stacked Panel

Step 3 – Use ODS to Pull Assembly Files
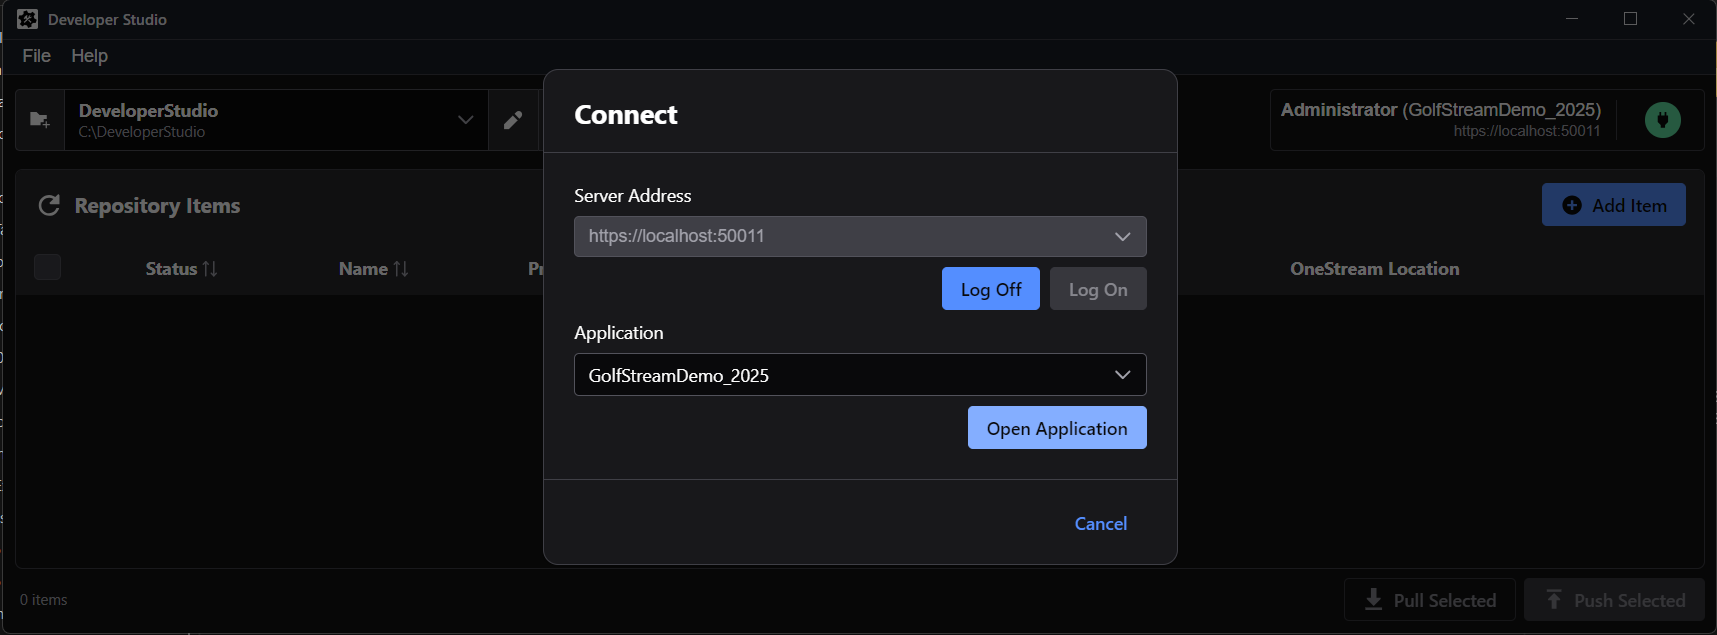
Launch ODS and connect to OneStream. Login to OneStream, select the application, and choose the assembly built with the Custom Page Configurator in step 1.
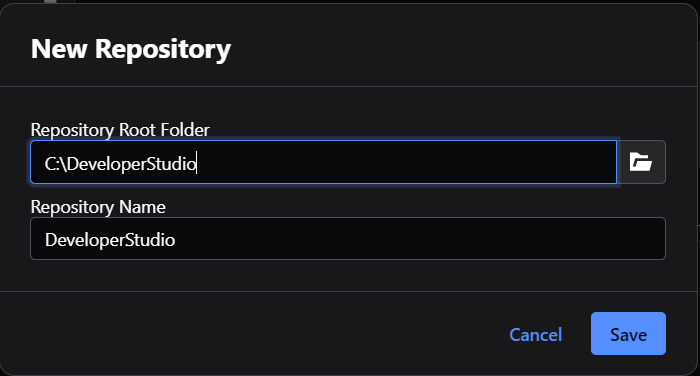
In ODS, select File and select Add Repository… This will be the destination for all pull requests from OneStream to ODS and source for push requests from ODS to OneStream.
Connect to the OneStream environment and select the application in which the Custom Page Maintenance Unit in Step 1 was created.
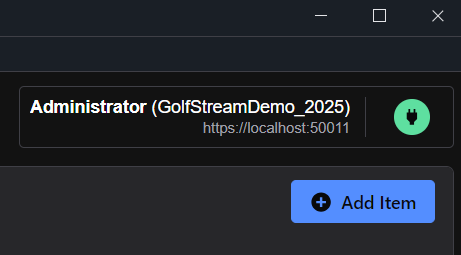
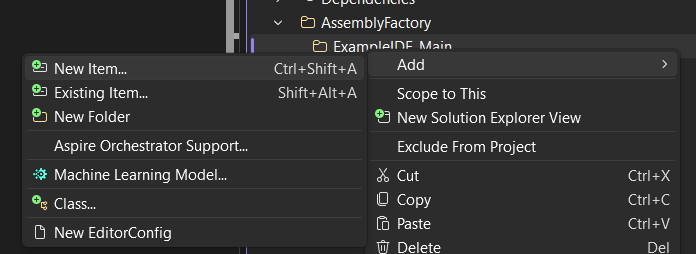
Choose Add Item:
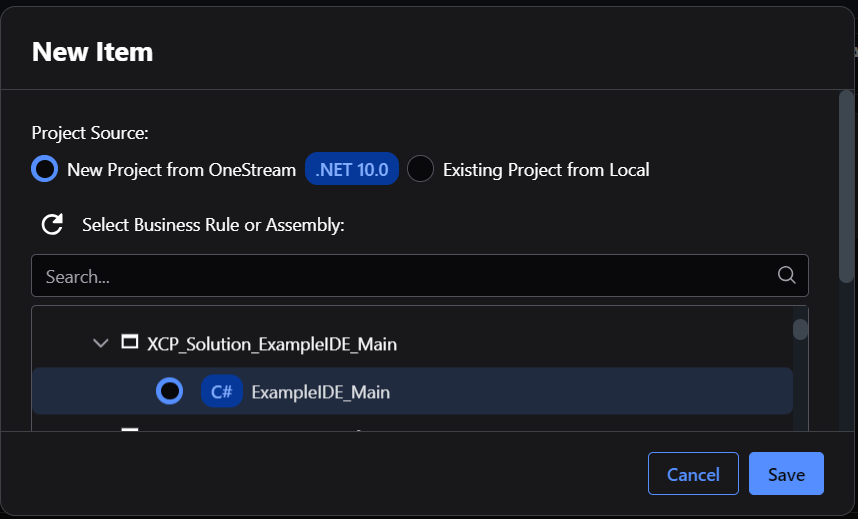
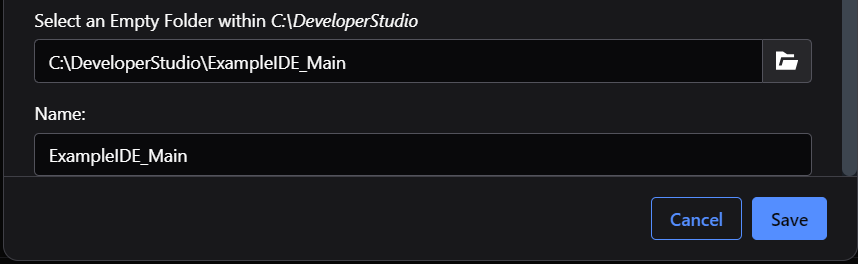
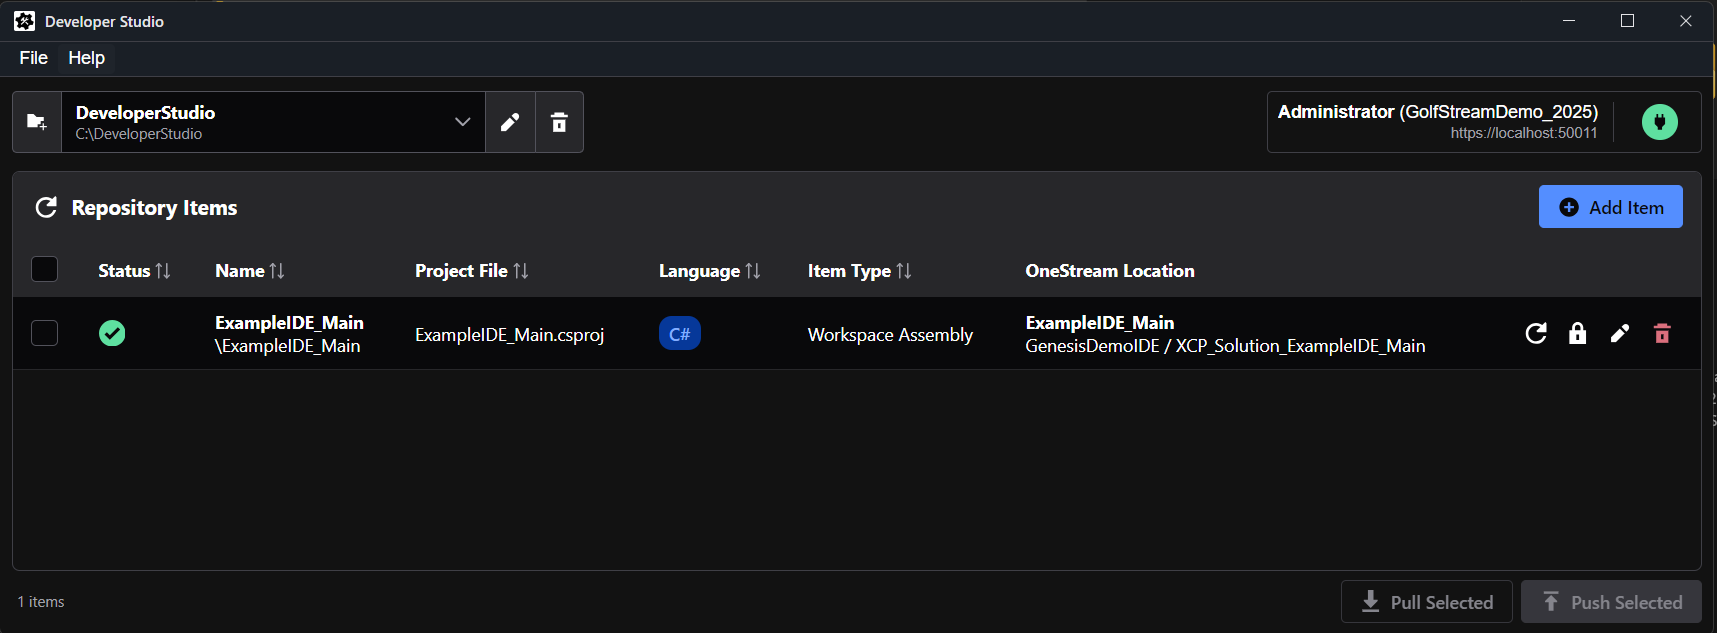
Navigate and select the ExampleIDE_Main assembly. Ensure that the correct repository is selected. ODS will automatically use the name of the Assembly as the directory name and create a new directory in the repository:
The Assembly will be pulled into the ODS repository
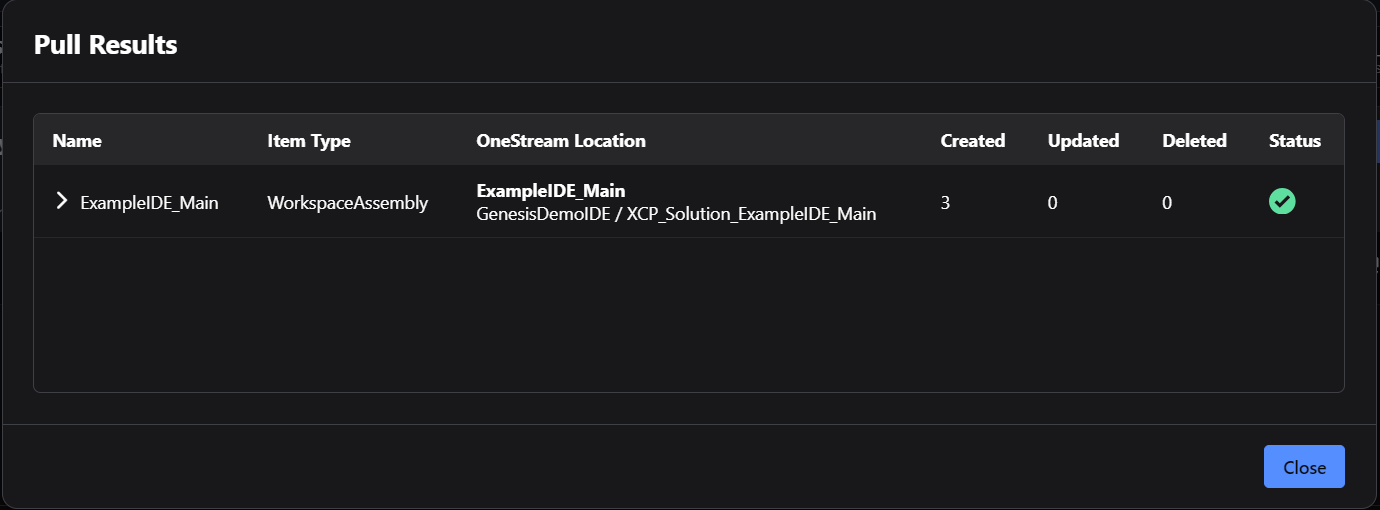
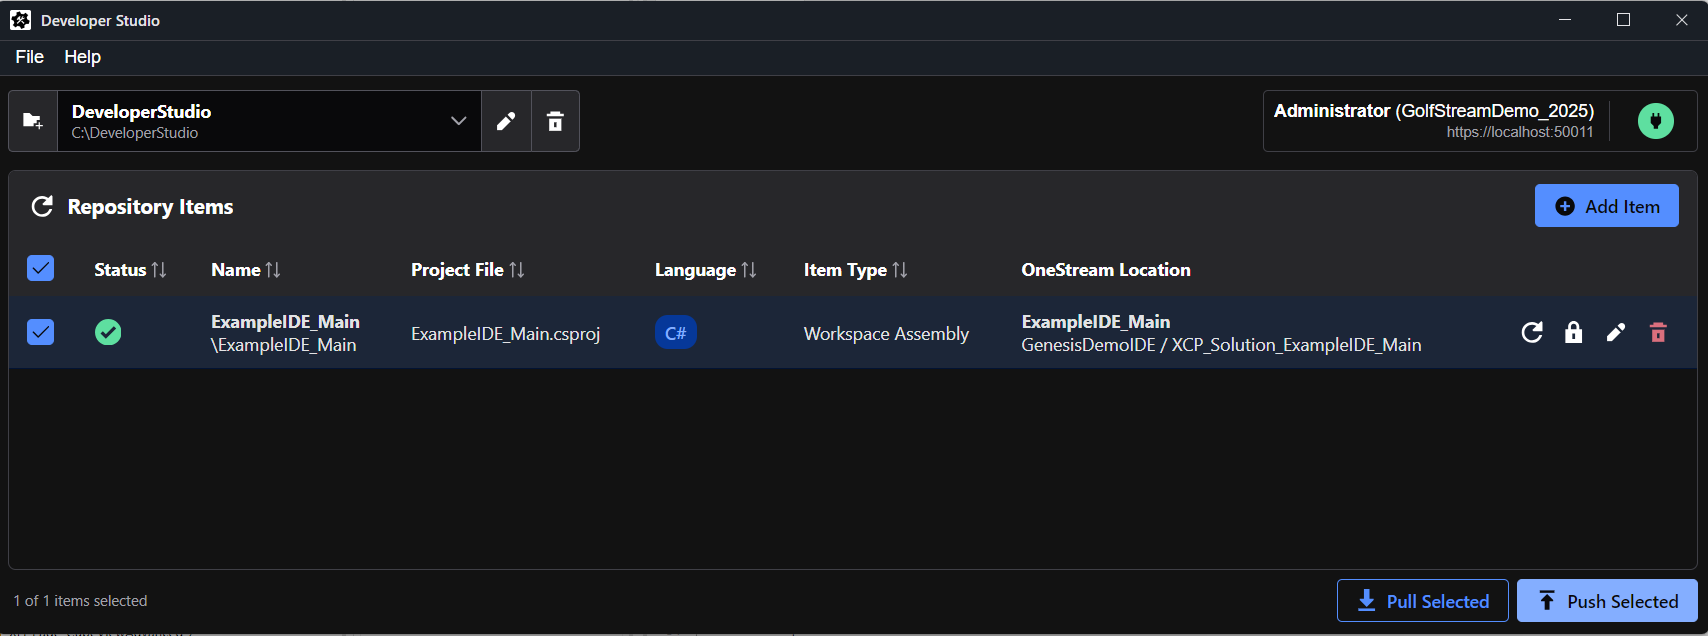
And it will appear in the ODS list of repository items:
Step 4 - Associate the .csproj file with OneStream Reference Assemblies
To enable IntelliSense for OneStream within the IDE, OneStream Reference Assemblies need to be applied to the project file (i.e. ExampleIDE_Main.csproj as pulled from OneStream via ODS).
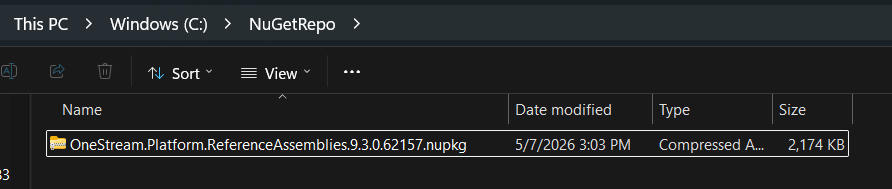
Create a folder to hold the reference assemblies NuGet package. In this example, a folder called NuGetRepo was created on C:
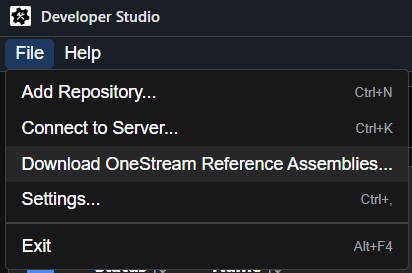
The Reference Assemblies can be found within ODS by going to the File menu and selecting Download OneStream Reference Assemblies:
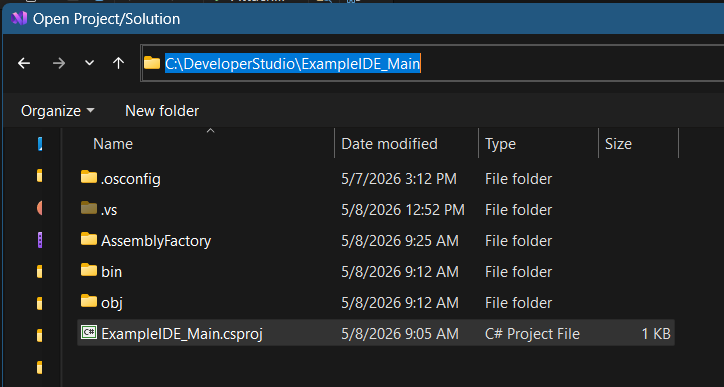
Open a command window and navigate where the project exists within the ODS repository (in this example C:\DeveloperStudio\ExampleIDE_Main). With the command “dotnet nuget add source”, point to the NuGet repository created above. “LocalRepo” will be the designated repository (name can be anything). Full line of commands shown below along with the outcome of successful execution of commands:
![]()
Next, add the NuGet package to the project using the command “dotnet add package OneStream.Platform.ReferenceAssembles – version 9.3.0.62157 ”. Ensure that the version number entered is the exact same version number included on the NuGet package. NuGet package used in this example, as downloaded from ODS, will look like this:
![]()
Full line of commands shown below:
![]()
Outcome of successful execution of commands:

Step 5 – Modifying the .csproj file in and IDE
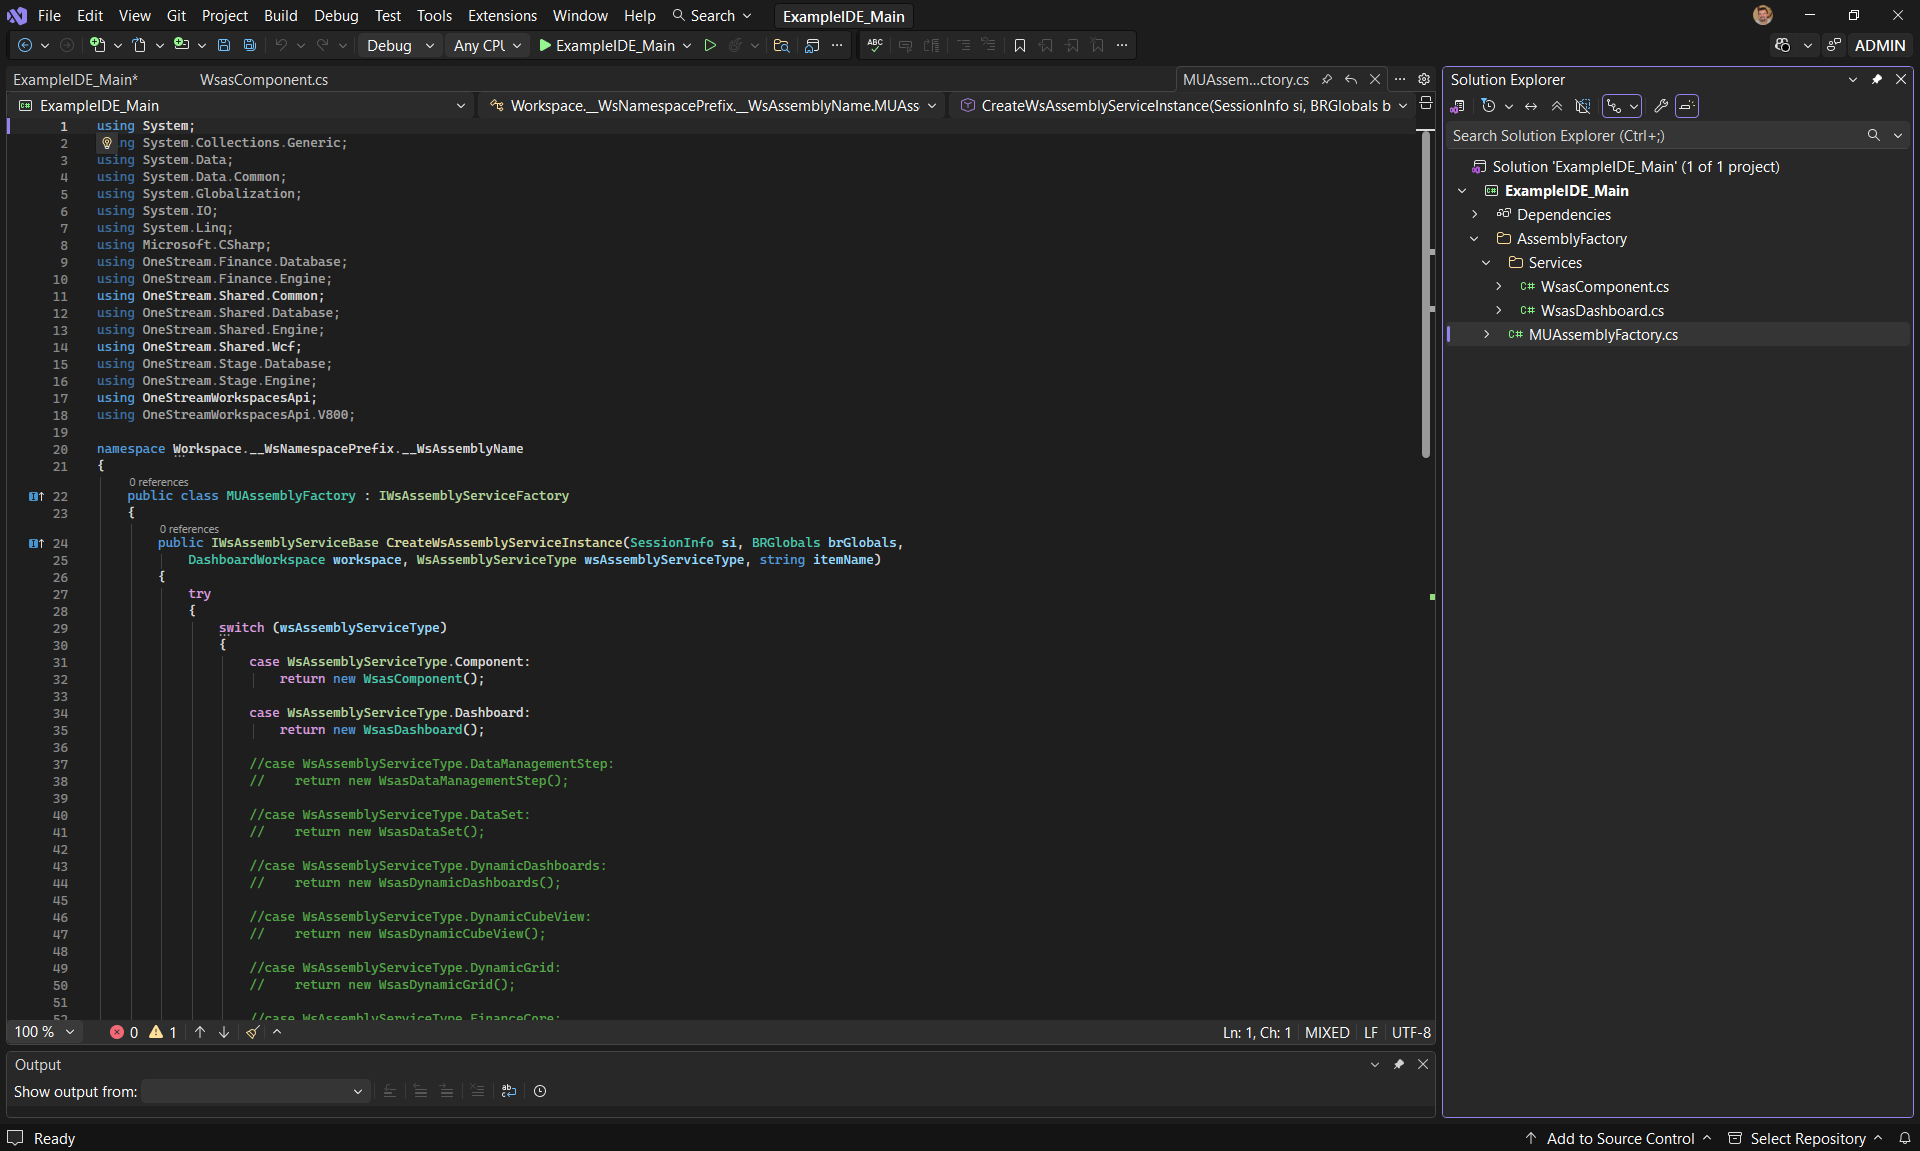
Launch your preferred IDE (in this case, Visual Studio 2026) and open the OneStream Project:
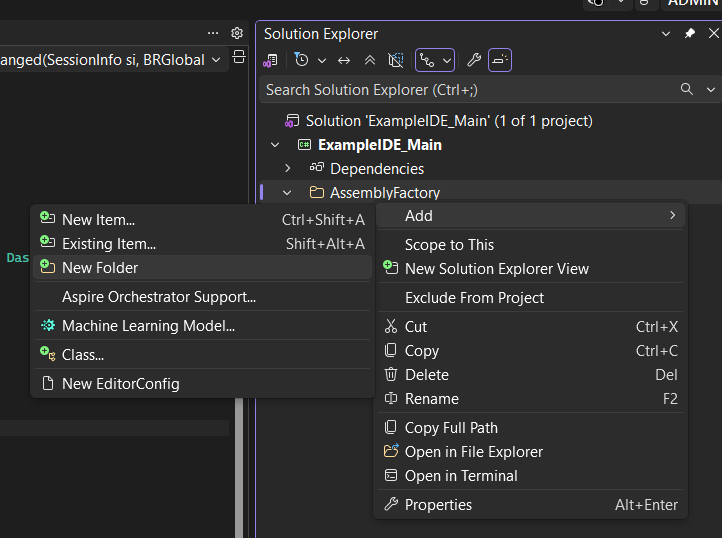
Next, create a folder and a file directly under the AssemblyFactory folder:
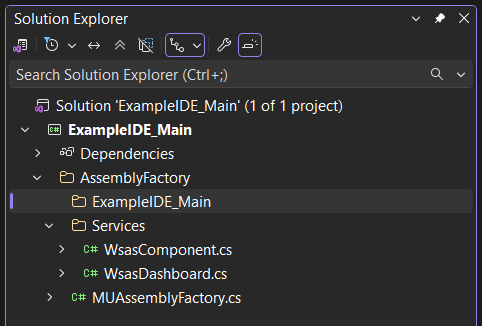
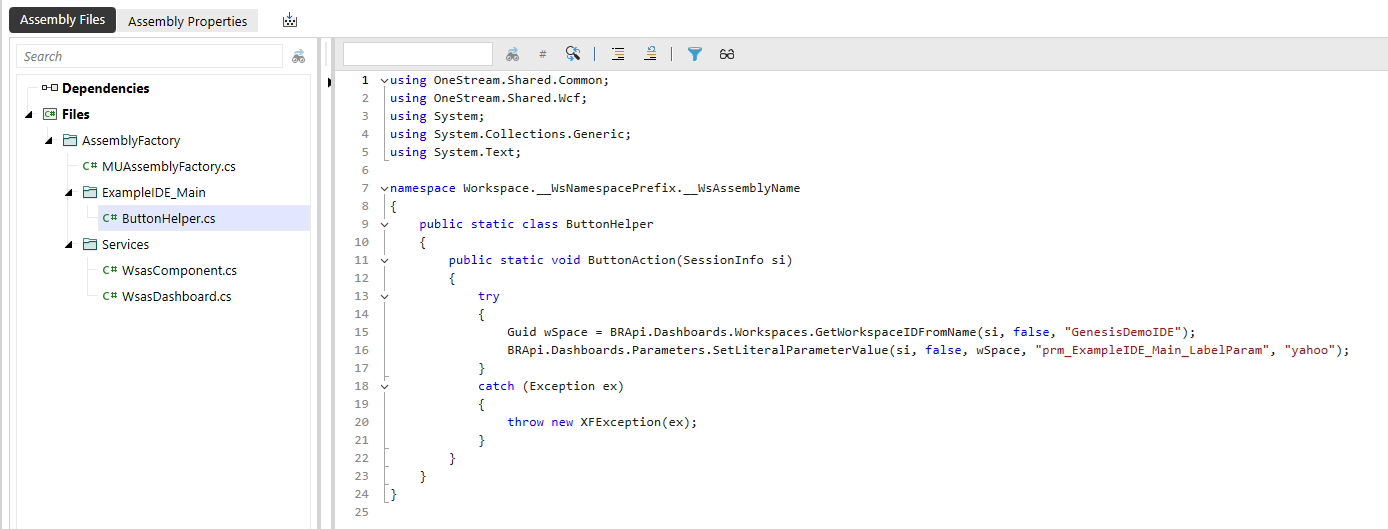
Create a file within the ExampleIDE_Main folder called ButtonHelper:

Within the new ButtonHelper class, add the following to include these OneStream namespaces:
using OneStream.Shared.Common;
using OneStream.Shared.Wcf;

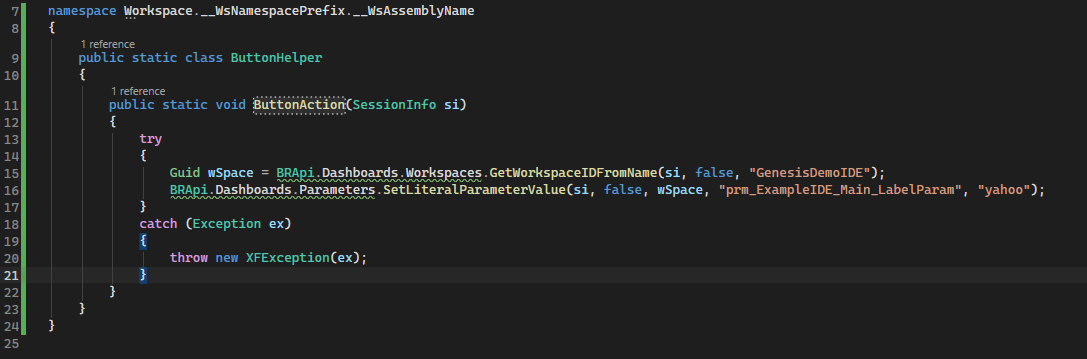
Use the following text for the logic:
namespace Workspace.__WsNamespacePrefix.__WsAssemblyName
{
    public static class ButtonHelper2
    {
        public static void ButtonAction2(SessionInfo si)
        {
            try
            {
                Guid wSpace = BRApi.Dashboards.Workspaces.GetWorkspaceIDFromName(si, false, "GenesisDemoIDE");
                BRApi.Dashboards.Parameters.SetLiteralParameterValue(si, false, wSpace, "prm_ExampleIDE_Main_LabelParam", "yahoo");
            }
            catch (Exception ex)
            {
                throw new XFException(ex);
            }
        }
    }
}
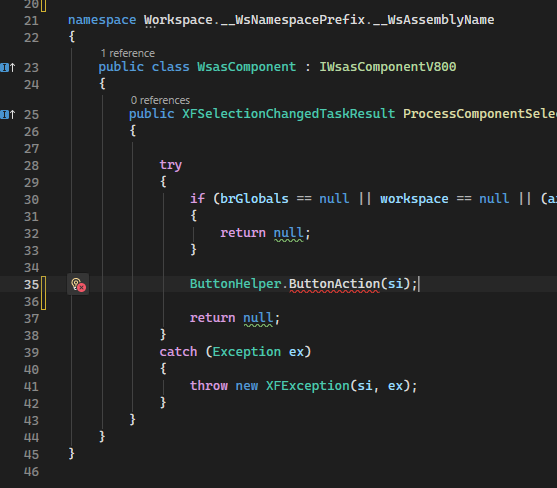
Select the WsasComponent class and add the following command within the try{} statement:
ButtonHelper.ButtonAction(si);
After saving these changes, perform a push to OneStream using Developer Studio:
Navigate back to OneStream and open the assembly to see all changes:
Run the XCP_ExampleIDE_Main_Main dashboard, select the button at the top, and see the result of these changes:
