Backup, Migrate, Restore, and Upgrade
This guide builds on the preceding Solution Packaging Kit (SPK) documents and provides the process for packaging (backing up) your Genesis instance and deploying (restoring and migrating) the package. This section will also provide details on how to migrate Genesis artifacts (Nav Groups, Pages, dashboards and associated components) between instances.
Instance Backup
After creating your Genesis instance, configuring your Application Groups, implementing content, and completing unit testing, you can perform a backup of the Genesis instance, which is the initial step before migrating and restoring.
- Access the Genesis Instance, then select the Settings
 icon.
icon.

- Select, Instance Management.

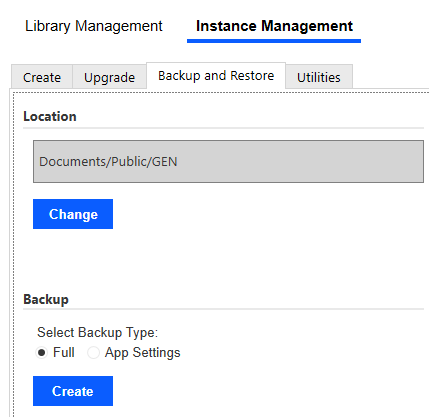
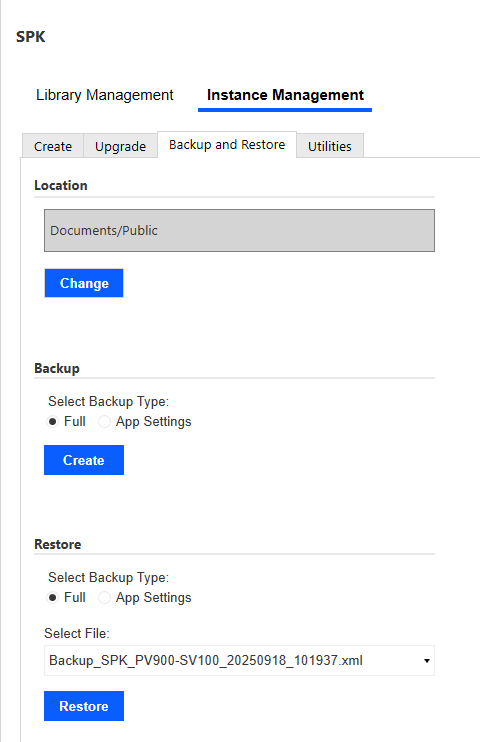
- Click the Backup and Restore tab.

- Select the Create button located below the Backup section. Location and Backup Type have default settings, and the Location can be updated by selecting the Change button if necessary. For migration and restoration, the default Backup Type of Full is appropriate.
The App Settings Backup Type includes customizations and configurations made in Genesis. This includes the Application Group settings, Navigation Groups and settings, Pages and settings, Page links, the selected color set, and style settings. It is a compressed .json file. This option enables you to copy customizations and configurations to another instance. Depending on the changes, this may be appropriate after the initial migration and restore.
- Select OK after the backup has completed.

Backing Up Genesis Application Artifacts
The following section will outline the steps required to either back up or migrate application artifacts such as Navigation Groups, Pages with injected blocks and/or linked content, and content created with the Custom Page Configurator. When backing up artifacts, or migrating individual artifacts from one Genesis instance to another, there are several things that need to be accounted for. Artifacts that must be extracted typically include, but may not be limited to, the following items:
- Navigation Groups
- Pages
- Injected Blocks
- Dashboards that are linked within Pages (if those dashboards are stored within the Genesis Workspace)
- Custom Pages created with the Custom Page Configurator
All artifacts listed above will be extracted as Maintenance Units from the Genesis Workspace using OneStream’s Load/Extract process. If being used for migration purposes, the resulting xml file will then have to be manually adjusted prior to upload in the target instance. Detailed instructions for this process are explained in the following sections.
Exporting Navigation Groups, Pages and Blocks
When creating Navigation Groups and Pages within the Genesis Designer, these objects are automatically generated as Maintenance Units inside the Genesis Workspace. The following example will demonstrate how MUs are generated and describe the associated naming convention.
For this example, we will use GenesisSourceInstance (which will be referred to here as the “source instance”) as the Genesis Workspace we’ll be exporting from and GenesisTargetInstance (“target instance”) as the Workspace we’ll be loading with the new components.
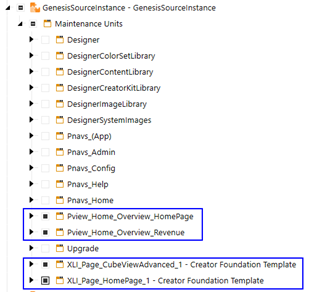
In the source instance, a structure was built with one Navigation Group containing two pages as shown in the image below:
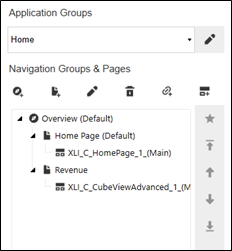
Within the two pages, the following Genesis blocks were used:
| Page | Component | Injected Block Name |
|---|---|---|
| Home Page | Home Page Block | XLI_C_HomePage_1 |
| Revenue | Cube View Advanced | XLI_C_CubeViewAdvanced_1 |
In order to export all of the content shown above (Nav Group, Pages and associated blocks), these items will have to be exported from the Genesis Workspace. The image below demonstrates how each of these times are created as Maintenance Units:
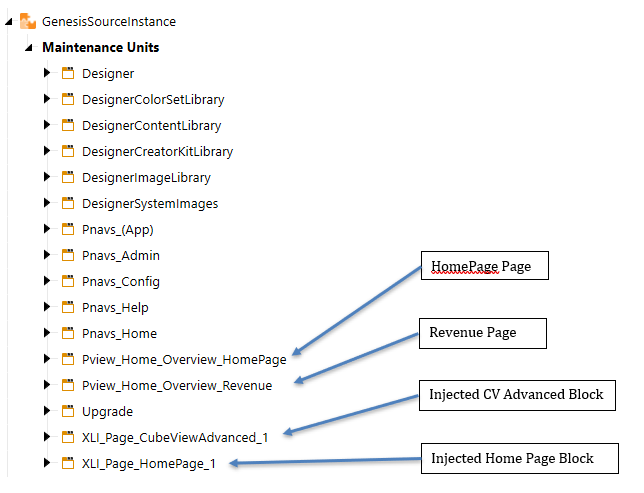
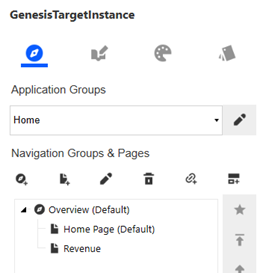
There is a common naming convention for NavGroups and Pages. The breakdown is as follows based on the HomePage menu item shown above:
![]()
- Position 1 - Pview – This is a Genesis standard prefix for the MU containing the NavGroup/Page combination
- Position 2 - Home – Denotes the Application Group that the menu item is contained in
- Position 3 – Overview – Name of the Navigation Group
- Position 4 – HomePage – Name of the Page which was added to the Navigation Group.
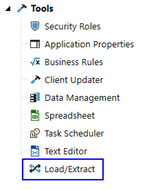
To build the export, navigate to the Application tab within OnePlace and select Load/Extract button under the Tools submenu:
Select the Extract tab. In the File Type drop down, select Application Workspaces:

Navigate to the Genesis instance from which the components need to be extracted and select only those components like the image below:
Click the Extract button ![]() and save the resulting .xml locally.
and save the resulting .xml locally.
Exporting Blocks with Embedded Components
When using components with embedded blocks such as the Advanced Dashboard Layouts, Cube View with Layouts, etc., all components used within the block must also be migrated as well. Simply exporting the layout block export, the blocks used within the different layout frames will not be automatically packaged up.
Exporting Linked Dashboards
Depending on where the linked dashboard exists within your OneStream application, export/import may not be necessary. For example, if the linked dashboard exists outside of the Genesis Workspace, that dashboard will not have to be moved, provided it is within the target application, in the exact same Workspace and MU as the source application. If it is required to move artifacts between two different applications or two different environments, (Dev to Test, Test to Prod, etc.), ensure that the dashboard and associated dashboard artifacts are present in the target application/environments and within the exact same Workspace(s) and Maintenance Unit(s). Genesis dashboard links are simply “pointers” existing content.
Exporting Custom Pages
When custom pages are created within a Genesis instance, either manually (refer to section XXXX for Maintenance Unit naming conventions) or by using the Custom Page Configurator block, all dashboards and components that are created to support the custom page need to be migrated from source to target Genesis instance. This is also accomplished via the standard Load/Extract options from the Application tab of OnePlace. Per naming standard, all custom page MUs will be prefixed with XCP* in the name; therefore, search for all relevant XCP* MUs that must move from source to target, extract from source and load to target. Below is an example of a handful of dashboards created with the Custom Page Configurator block to demonstrate how they are created within the Genesis Workspace:
The .xml may now be either stored locally or in the OneStream File Explorer for backup purposes or be imported into the target instance to for artifact migration. If being used for migration, the .xml file must be manually edited to reference the target instance of Genesis into which it will be loaded. Using a text editor (Notepad++ is used in this example), open the .xml and find line 5 which. In this line, change three properties for the workspace – name, description and sharedWorkspaceNames. For all three of these properties, use the name of the target Genesis Workspace. For this example they will be named GenesisTargetInstance. Save this file once the rename has been completed.
![]()
Migrating Genesis Application Artifacts to the Target Instance
Prior to loading an extracted .xml of Genesis artifacts, the basic menu structure in the target Genesis instance must be created. Do not add blocks or linked objects – only create the Nav Groups and Pages identical to the source instance:
Once the basic menu structure of Genesis in the target instance is created, the.xml file may be loaded. Ensure that the .xml has been modified to reflect the target instance into which it will be loaded as described in the prior section:

When the file is loaded into the target instance, all required components will be displayed within the Workspace:
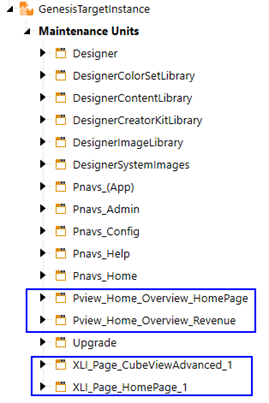
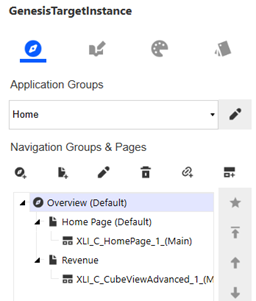
Genesis will automatically show all new components in the Application Group(s) into which the MUs were loaded:
Migrate and Restore Application Instances
Having created a backup file in the previous section, the Full backup can be migrated and restored. When you restore an instance, it will replace either the full Genesis Workspace (Full backup) or the customizations and configurations (App Settings backup).
- From the OneStream application where the backup occurred, select the File Explorer
 icon.
icon.

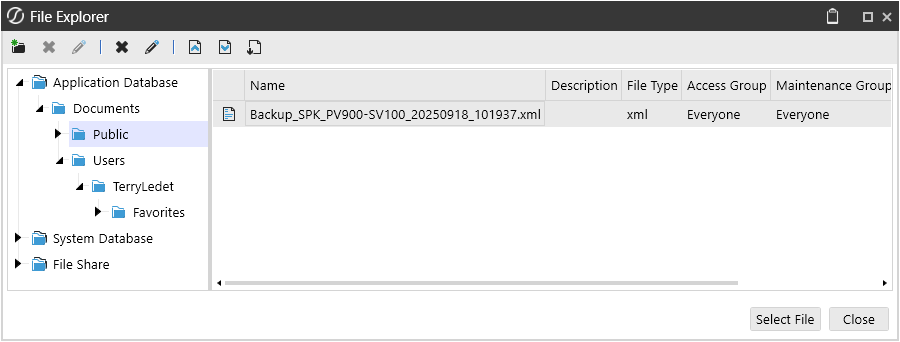
- Navigate to the path, Application Database -> Documents -> Public -> GEN, where the backup was created. Select the backup file and then click the Download file
 icon.
icon.
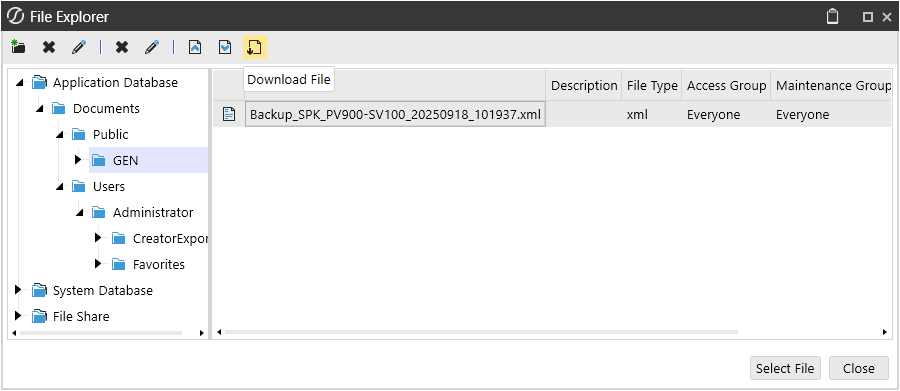
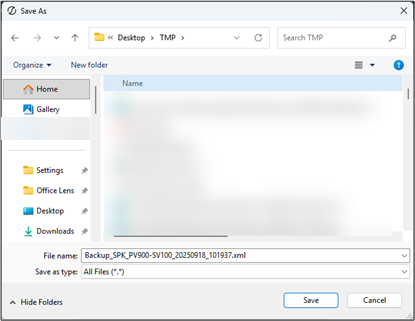
- Save the backup file to your preferred folder.
- Log out of this application and authenticate to the application where the restore will occur.
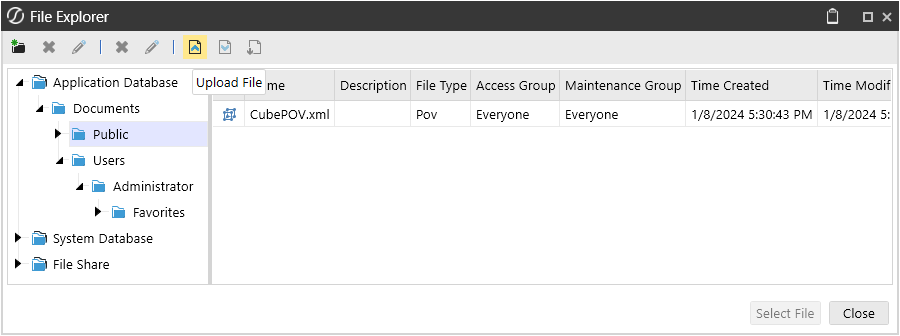
- From the OneStream application where the restore will occur, select the File Explorer icon.
- Navigate to the path to upload the file to and then select the Upload File
 icon.
icon.
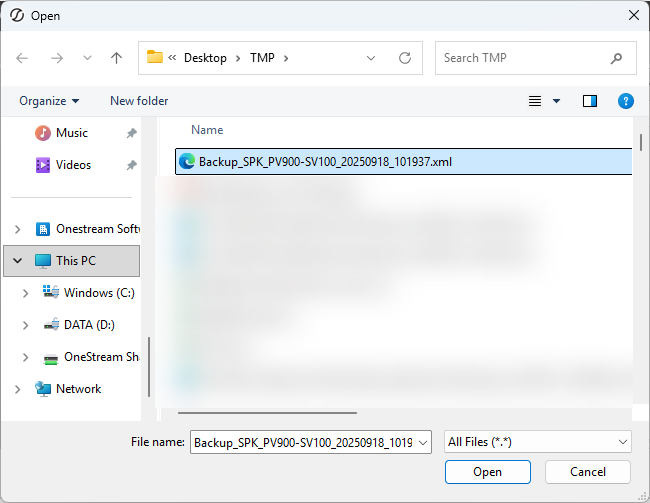
- Select the previously downloaded file, and once this is done, select Open.
- Once the file has been successfully uploaded, access the default Genesis instance. If the application does not have the default Genesis instance, it should be imported before proceeding to the next step.
- Create the instance to which the backup file is restored. In this example, the Genesis instance is SPK. For the process of creating the SPK instance, please refer to the document Create Solution—Genesis Designer—Create a Genesis Instance.
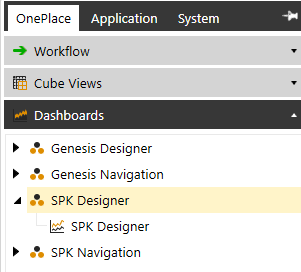
- Select SPK Designer, i.e., the Designer page for the Instance.
- With the designer instance accessed, select the Settings icon.
- Select, Instance Management.
- Click the Backup and Restore tab.
- Click the Change button to update the Location to the path of the backup file uploaded previously.

- Select OK to close the dialog box stating that the Backup Location was changed successfully.

- Select Restore to import the backup file and then select OK. Once the restoration is complete, verify the migration.

Upgrade
When a new version of Genesis is released, you may want to upgrade your Genesis Instance. Reducing risks, as part of the upgrade, backup files of the instance are created and saved in the location specified on the BACKUP AND RESTORE page. These backup files can be used to restore the instance to a previous state. An upgrade does not affect content developed within Genesis, only artifacts that are included within a Genesis instance.
- Select the Designer for your Genesis instance. In this example, the designer is SPK Designer, which is accessible from OnePlace -> Dashboards -> SPK Designer -> SPK Designer.
- With the Genesis instance accessed, select the Settings icon.
- Select, Instance Management.
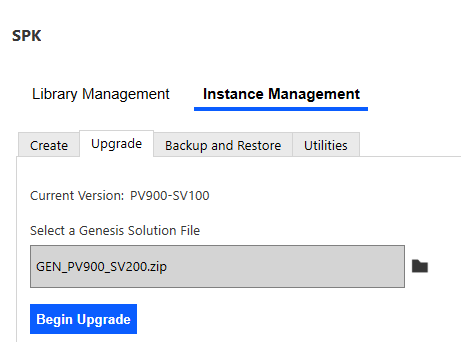
- Click the Upgrade tab.
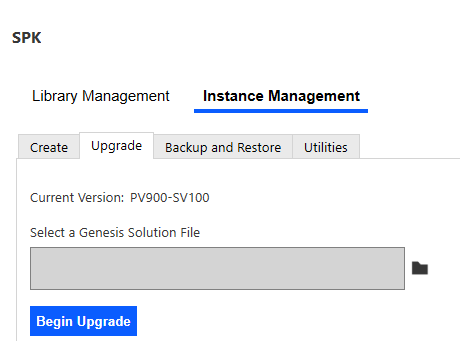
- Select the folder
 icon and navigate to and select the Genesis file downloaded from Solution Exchange. Once the file is uploaded, select Begin Upgrade.
- Select Complete Upgrade.

- Select OK after the instance is upgraded.
