Creating RSI Assignments
The following guide walks through the process of creating RSI Assignments in Xperiflow Administration Tools (XAT). An RSI Assignment is the fundamental unit of access control in Xperiflow, binding together a Role, a Scope, and an Identity to grant a user specific permissions within a defined boundary.
Prerequisites
Before creating RSI Assignments, ensure the following are in place:
-
Xperiflow Administration Tools (XAT) is installed and launched. See the Install Guide - Xperiflow Administration Tools (XAT) for setup instructions.
-
A Personal Access Token (PAT) is configured for the System User. See the (XAT) Personal Access Token Setup Guide.
- This step is only necessary for Xperiflow versions 4.0.0 through 4.1.1.
-
The user performing the setup has Administrator access to XAT (or is an initial administrator performing first-time setup).
What Is an RSI Assignment?
An RSI Assignment binds a Role (what permissions), a Scope (where they apply), and an Identity (who receives them) into a single grant of access. For example, "Jane has the Editor role in the Anomaly Detector scope" grants Jane write-level access within that scope alone.
Users must have at least one RSI Assignment to interact with SensibleAI Forecast, SensibleAI Studio, or SensibleAI Studio-powered solutions. For a full explanation of identities, roles, permissions, scopes, and how access is resolved, see Xperiflow Access Controls.
Step 1: Navigate to XAT Access Controls
Open the XAT solution in OneStream and navigate to the Access Controls section. The left navigation bar contains four options:
- Identity — Manage users and groups.
- Role — View and manage roles and their permissions.
- Scope — View and manage scopes.
- Assign — Create and manage RSI Assignments.
-20260330-152231-3a4637651260d8e020afca9f9e5d7c57.png)
Step 2: Add a User Identity
Before creating an RSI Assignment, the target user must exist as an Identity in XAT. If the user already exists, skip to Step 3.
2a. Open the Identity Page
Select the Identity option from the left navigation bar to open the Identity page. This page displays a grid of all existing user and group identities.
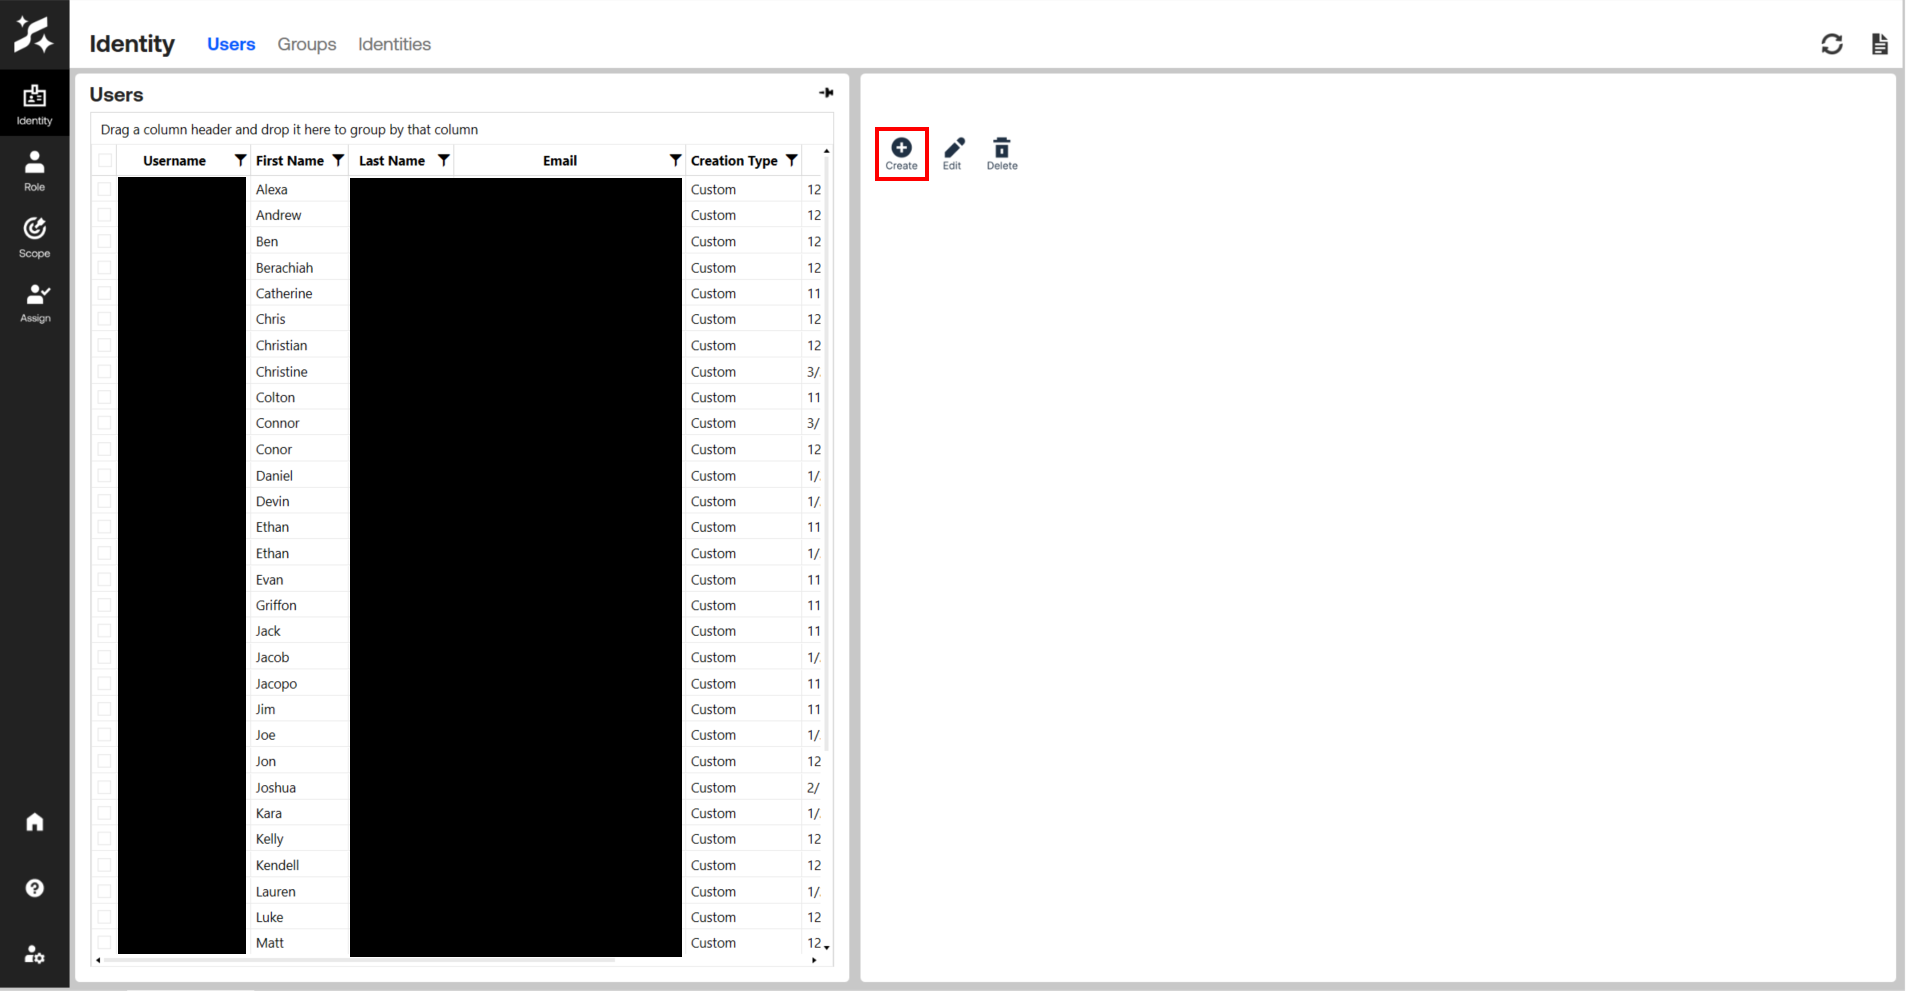
2b. Launch the Create User Dialog
Click the Create User button in the upper toolbar to open the guided user creation workflow.
2c. Select OneStream User(s)
The first step of the dialog — "1. Select User" — presents a list of OneStream users available to add. Locate the desired user account and select it.
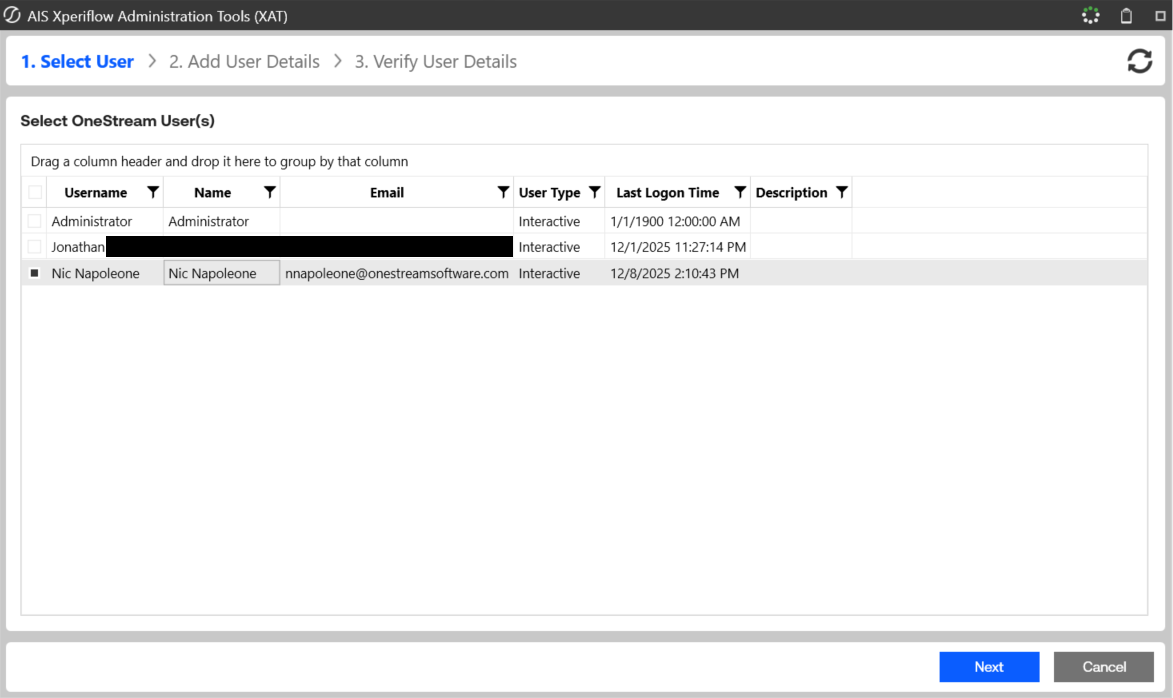
Click Next to proceed.
2d. Add User Details
The second step — "2. Add User Details" — allows you to review and confirm the user's details (first name, last name, email). These fields are pre-populated from the OneStream user profile.
Click Next to proceed.
2e. Verify and Submit
The third step — "3. Verify User Details" — displays a summary of the user to be created. Review the information and click Submit to create the identity.
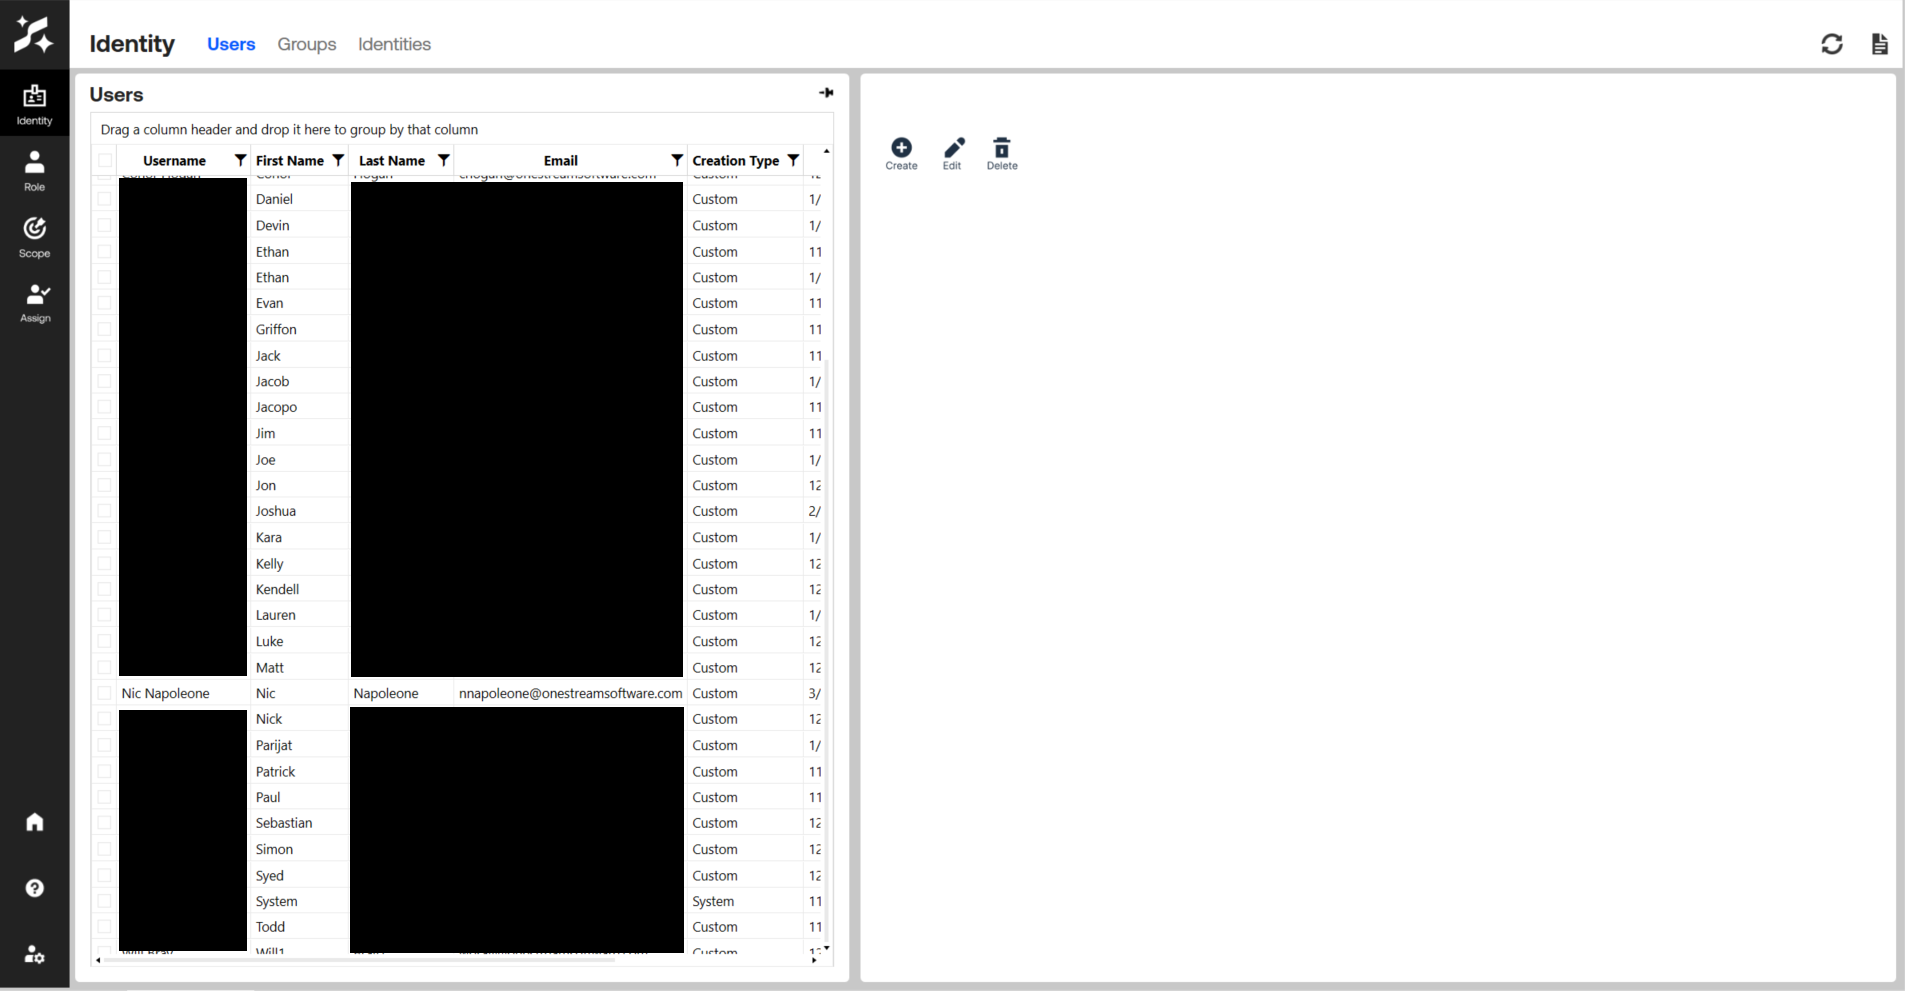
A confirmation message appears upon successful creation. The new user now appears in the Identity page grid.
Step 3: Review Available Roles and Scopes
Before creating the RSI Assignment, it is helpful to familiarize yourself with the available roles and scopes in your environment. For a breakdown of built-in roles (Viewer, Editor, Manager, Admin), scope types (Global, App, Solution, AppSolution, Project), and how permissions are resolved, see Xperiflow Access Controls.
View Roles
Select the Role option from the left navigation bar. The Roles page displays all system and custom roles available in your environment.
-20260330-154220-054f8ea884e21cce765b67d3d5d10b7f.png)
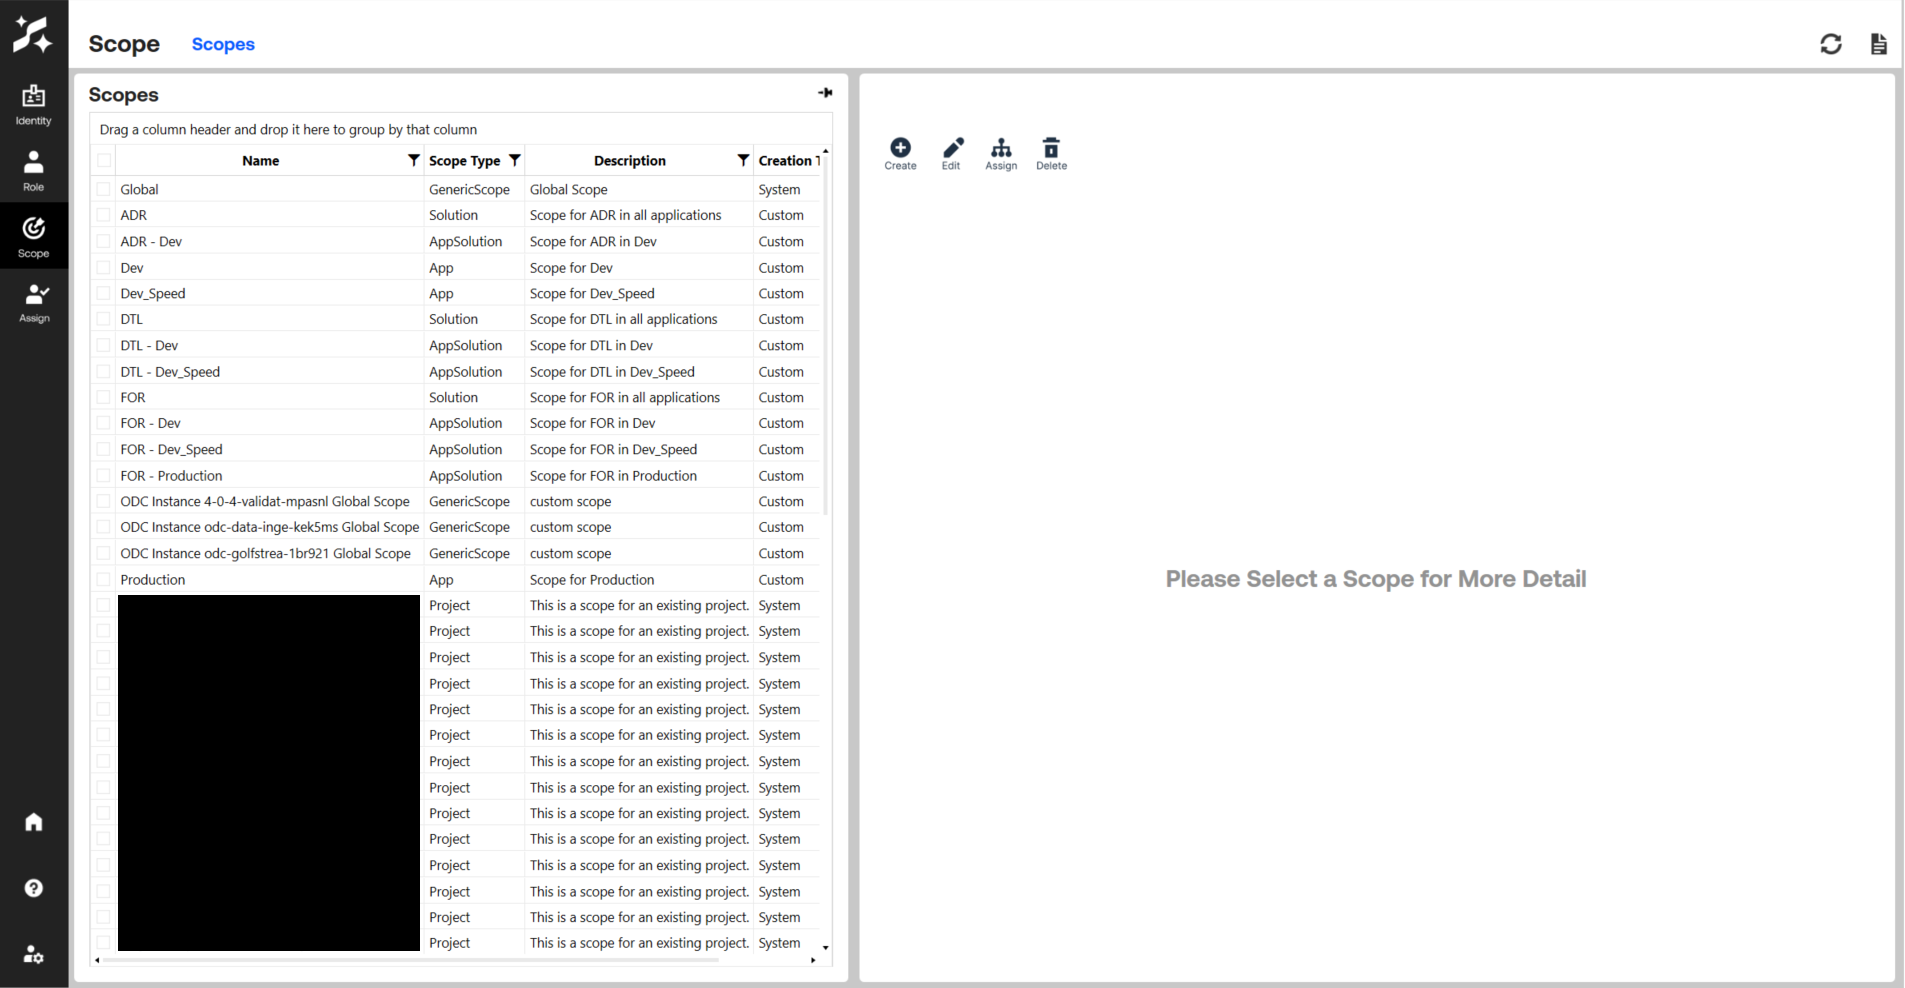
View Scopes
Select the Scope option from the left navigation bar. The Scopes page displays the hierarchy of scopes available in the environment.
Step 4: Create the RSI Assignment
4a. Open the Assign Page
Select the Assign option from the left navigation bar. The RSI Assignments page displays a grid of all existing RSI Assignments in the system, showing the identity name, role name, and scope name for each assignment.
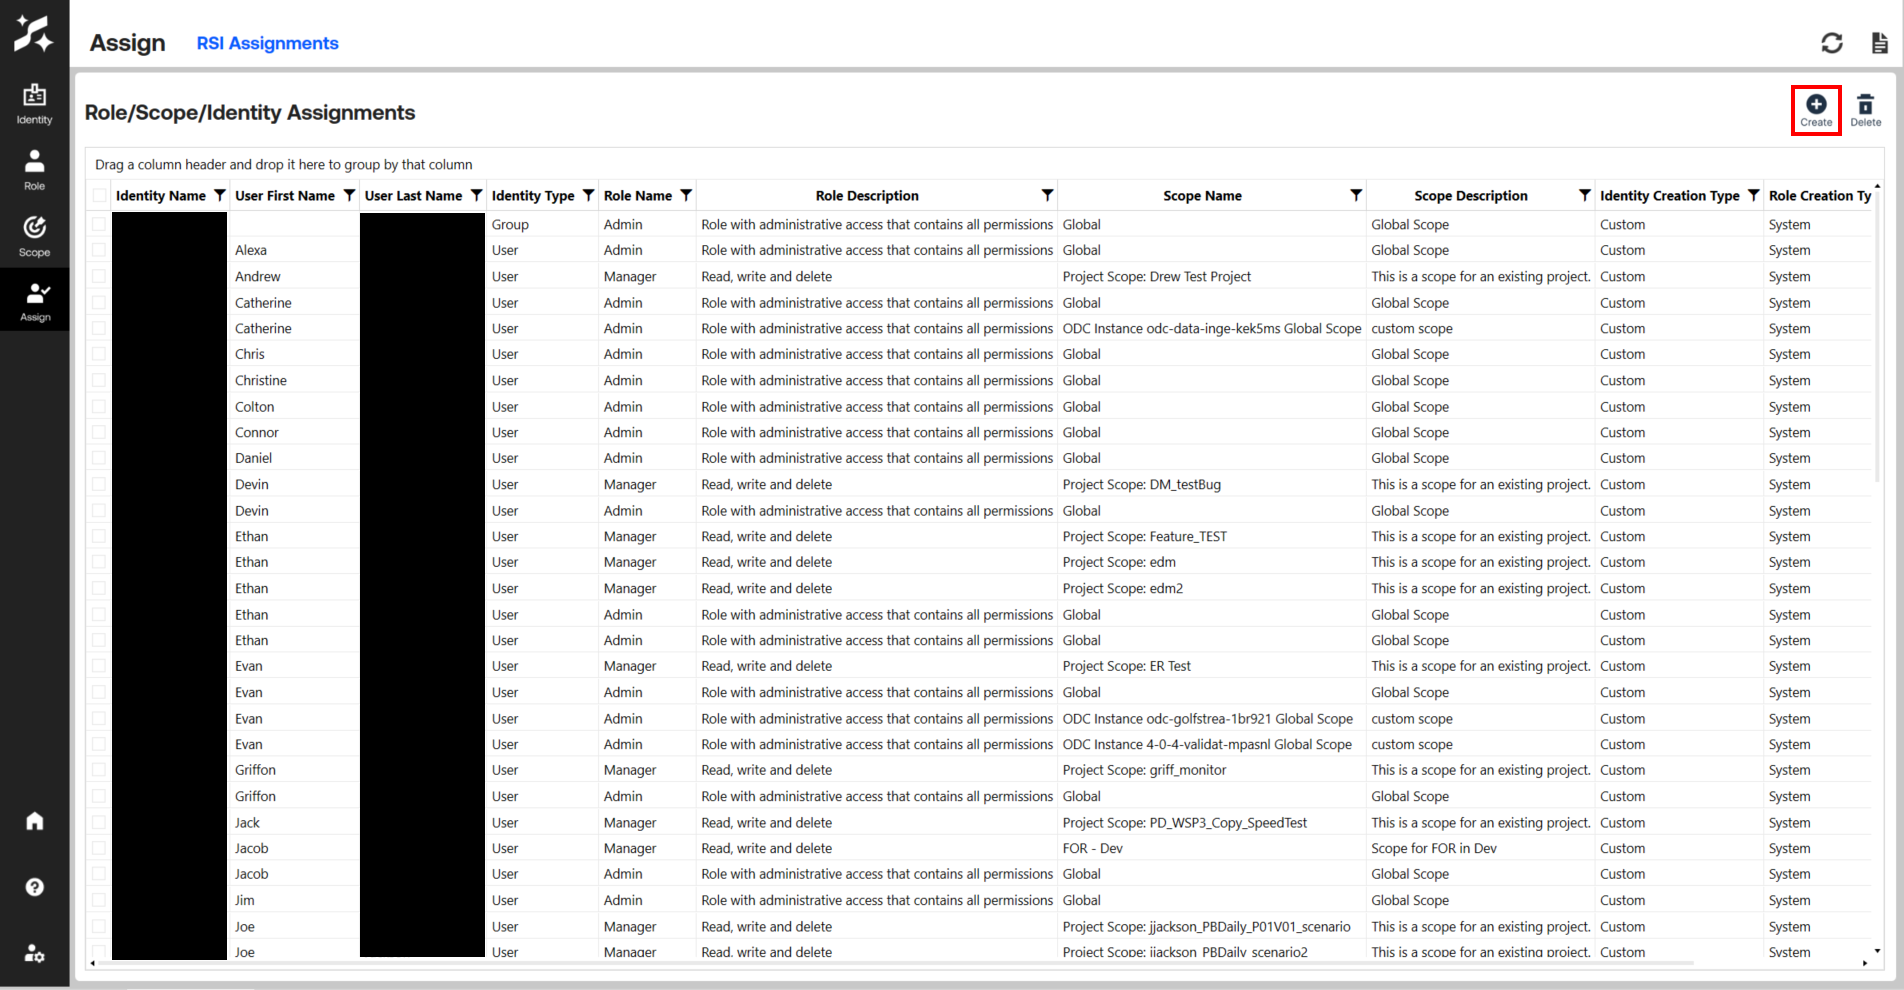
4b. Launch the Create RSI Assignment Dialog
Click the Create RSI Assignment button in the upper toolbar to open the guided assignment creation workflow. This workflow consists of four steps.
4c. Step 1 — Select Scope
The first step — "1. Select Scope" — displays a grid of all available scopes. Select the scope that defines where the role assignment should apply.
For first-time administrator setup, select Global to grant system-wide access.
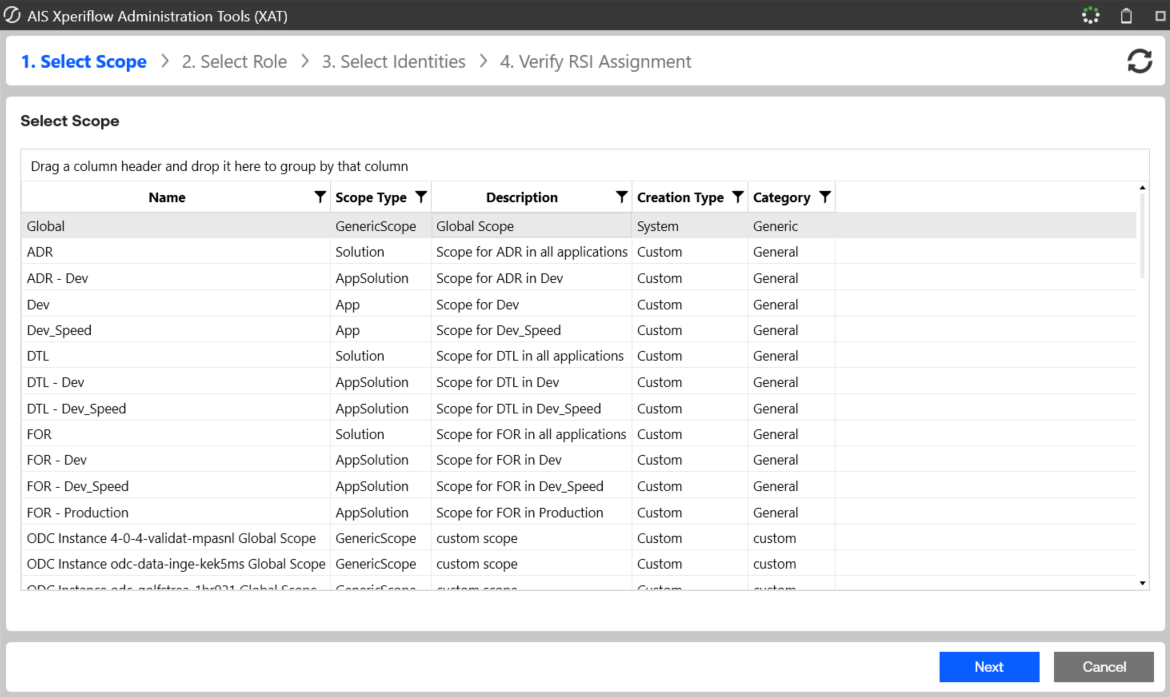
Click Next to proceed.
4d. Step 2 — Select Role
The second step — "2. Select Role" — displays a grid of all available roles. Select the role that defines what permissions the identity should receive within the chosen scope.
For first-time administrator setup, select Admin to grant full system access.
-20260330-155356-3b91dbed3a7dabf90fd2a66583f0ce9a.png)
Click Next to proceed.
4e. Step 3 — Select Identity
The third step — "3. Select Identities" — displays a grid of all user and group identities. Select one or more identities to assign the chosen role within the chosen scope.
Multiple identities can be selected at this step. Each selected identity will receive its own RSI Assignment with the same role and scope combination.
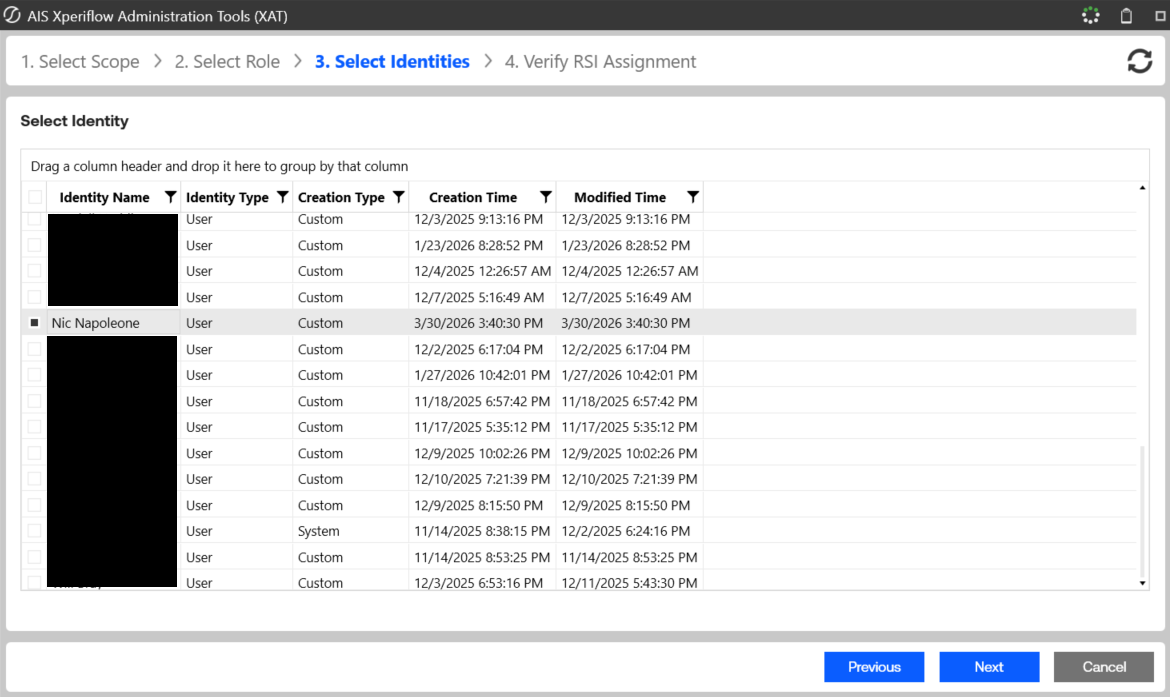
Click Next to proceed.
4f. Step 4 — Verify and Submit
The final step — "4. Verify RSI Assignment" — displays a summary of the assignment(s) about to be created, including the selected scope, role, and identity names. Review the information carefully.
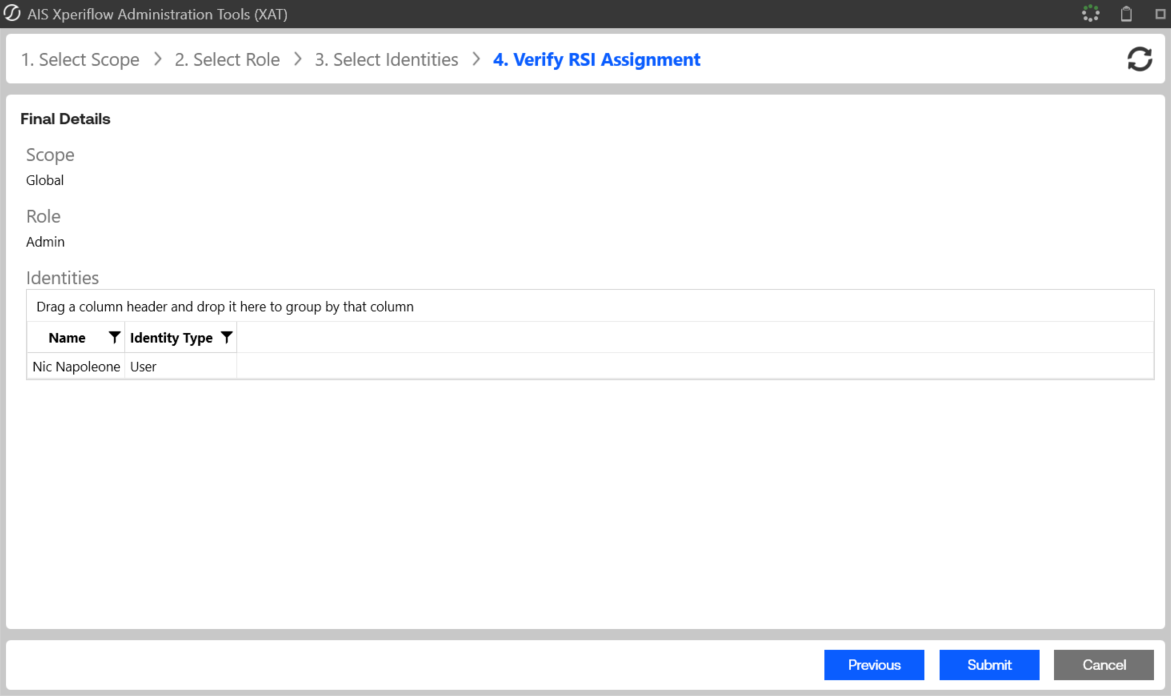
Click Submit to create the RSI Assignment(s). A confirmation message appears upon successful creation.
4g. Confirm the Assignment
After submission, the RSI Assignments page refreshes and the new assignment(s) appear in the grid.
-20260330-155702-9e71f5939d1fe851a937dd0efb08f527.png)
Summary
Creating an RSI Assignment in XAT follows a structured workflow:
- Add the user as an Identity on the Identity page (if not already present).
- Review the available Roles and Scopes to understand what access to grant and where.
- Navigate to the Assign page and launch the Create RSI Assignment dialog.
- Select the Scope, then the Role, then the Identity (or Identities).
- Verify the assignment details and Submit.
The new RSI Assignment takes effect immediately, granting the selected identity the permissions defined by the chosen role within the specified scope.