Genesis Instance
A Genesis Instance is the default setup of the Genesis Workspace created to support a specific solution or development within Genesis. Creating a new Instance allows teams to separate workstreams and customize them to meet business needs. A solution can be created using multiple Genesis Instances, each isolated to address different business requirements and to enable segregation of duties.
You should create an instance of Genesis before starting your Genesis journey. Installing Genesis is a prerequisite for creating an instance, as discussed in the next section. Once Genesis is installed, you can proceed directly to Instance Management.
Installing Genesis
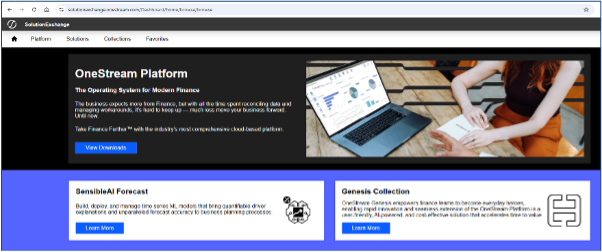
Genesis is available from Solution Exchange, and to download the file to import, first access Solution Exchange. The next image is after successful authentication, and once authenticated, select the Learn More button within the Genesis Collection tile. Genesis requires Platform version 9.0.0 or later.
-
Select Download to download the zip file, GEN_PV9.0.0_GV100_PackageContents.zip.


-
Log into the application into which Genesis will be imported with a user account with the appropriate permissions. This example will proceed with an application named Dev.

-
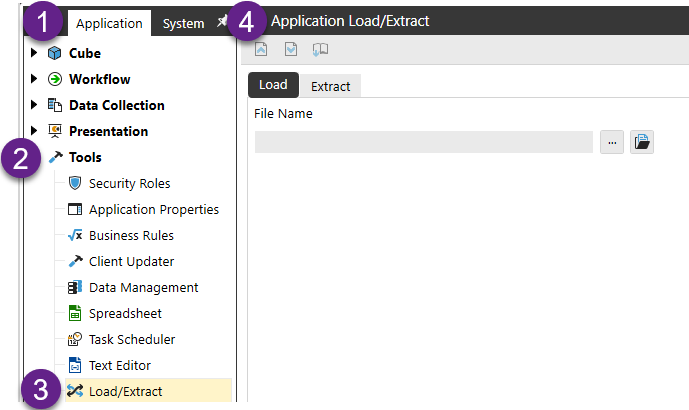
Select Application (1) -> Tools (2) -> Load/Extract (3), to display the Application Load/Extract page (4).
-
From the Application Load/Extract page, select the ellipsis
 and navigate to and select the zip file.
-
When the zip file is selected and displayed as the File Name, select the import
 icon. After a short period of time, the Task Progress bar displaying progress will close after a successful import.
 -
The Application Load/Extract page can be closed, and the application should be refreshed by clicking the Refresh Application
 icon.
icon.
-
Genesis Designer can be accessed from OnePlace (1) -> Dashboards (2) -> Genesis Designer (3) -> Genesis Designer (4).
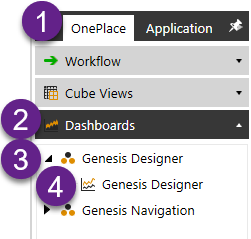
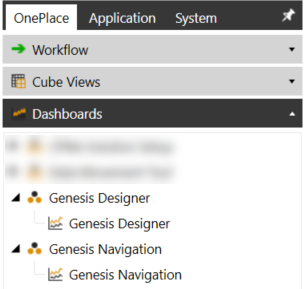
Once Genesis is installed, the Designer and Navigation dashboards can be accessed through the OnePlace pane.
-
Windows Application:
-
Browser:

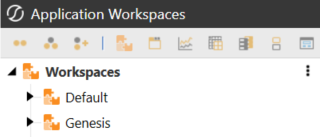
Additionally, the installation creates a Workspace accessible through the Windows application by selecting Application -> Workspaces -> Genesis. This Workspace stores the solution artifacts.
Instance Management
Each instance of Genesis is a unique Workspace. On the Instance Management page, you can create, upgrade, back up, and restore an instance. You can also set the default state for the Preview tab in Designer Home.
Create a New Genesis Instance
You should create a new instance of Genesis before beginning your Genesis journey to support development and align with business requirements. When a new Instance of Genesis is created, it is provisioned with the default Genesis configuration, serving as a clean starting point. Importantly, a new Instance is not cloned from an existing one—it is established independently to avoid inheriting customizations, conflicts, or dependencies from prior Instances.
As mentioned in the section above (Genesis Instance), a solution can support multiple instances of Genesis. However, one should create multiple instances only when necessitated by distinctly clear business requirements for each instance and / or segregation of duties.
-
Navigate to Designer > Settings

-
In Settings > Instance Management, click the CREATE tab.
-
In the Enter Instance Name field, enter a new name for the instance e.g. “SPK”. Choose a label of up to eighty characters in length, tailored to your business process or business needs as appropriate.

The instance name must be unique and use alphanumeric characters (A–Z, a–z, and 0–9). The maximum number of characters is 80. The name cannot include symbols or reserved words. See Reserved Words.
-
Click the Create button.
-
A dialog will appear indicating the successful creation. Click OK after the Genesis instance is created.

Accessing an Instance
Once the Genesis instance “SPK” in this example is created, select the “Refresh Application” ![]() icon.
icon.
After the application refreshes, select the OnePlace pane, expand Dashboards, and the Dashboards list will now present SPK Designer and SPK Navigation. Select SPK Designer to begin your Genesis journey.
-
Windows Application:

-
Browser:
